
Today renew your pledge to quit smoking...If you have tried to quit smoking and failed before, take comfort in the fact that most smokers fail several times before quitting successfully.
Your past failures are not a lesson that you are unable to quit. Instead, view them as part of the normal journey toward becoming a nonsmoker.
Here are 12 techniques that will help you quit the habit.
Remember - you can do it!
1. Deep Breathing Perhaps The Single Most Powerful And Important Technique: Every time you want a cigarette, do the following. Do it three times.
Inhale the deepest lung-full of air you can, and then, very slowly, exhale. Purse your lips so that the air must come out slowly. As you exhale, close your eyes, and let your chin gradually sink over onto your chest. Visualize all the tension leaving your body, slowly draining out of your fingers and toes, just flowing on out.
This is a variation of a yoga technique and is very relaxing. If you practice this, you'll be able to use it for any future stressful situation you find yourself in. And it will be your greatest weapon during the strong cravings sure to assault you over the first few days.
2. Taking In Fluids:
The first few days, drink LOTS of water and fluids to help flush out the nicotine and other poisons from your body.
Remember that the urge to smoke only lasts a few minutes, and will then pass. The urges gradually become farther and farther apart as the days go by.
3. Stay Away From Alcohol, Sugar And Coffee
Do your very best to stay away from alcohol, sugar and coffee the first week or longer, as these tend to stimulate the desire for a cigarette. Avoid fatty foods, as your metabolism will slow down a bit without the nicotine, and you may gain weight even if you eat the same amount as before quitting. So discipline about diet is extra important now. No one ever said acquiring new habits would be easy!
Nibble on low calorie foods like celery, apples and carrots. Chew gum or suck on cinnamon sticks.
Stretch out your meals; eat slowly and wait a bit between bites.
After dinner, instead of a cigarette, treat yourself to a cup of mint tea or a peppermint candy.
4.Taking An Oral Substitute
In one study, about 25% of quitters found that an oral substitute was invaluable. Another 25% didn't like the idea at all - they wanted a clean break with cigarettes. The rest weren't certain.
One can use cinnamon sticks, chewing gum or artificial cigarettes as a substitute. You will mostly find that after the first week of being a non smoker, you wouldn’t even need these.
5. Get Exercising
Go to a gym, sit in the steam, exercise. Change your normal routine – take time to walk or even jog around the block or in the local park.
6.Pamper Yourself
Go ahead and join a yoga class or maybe reiki – they're great! Get a one hour massage, take a long bath - pamper yourself. Get yourself involved in a hobby.
7. Ask For Support
Ask for support from co-workers, friends and family members. Ask for their tolerance. Let them know you're quitting, and that you might be edgy or grumpy for a few days. If you don't ask for support, you certainly won't get any. If you do, you'll be surprised how much it can help. Take a chance - try it and see!
Ask friends and family members not to smoke in your presence. Don't be afraid to ask. This is more important than you may realize.
8. Destroy All Your Cigarettes
On your quit day, hide all ashtrays and destroy all your cigarettes, preferably with water, so no part of them is smokeable.
9. Write It Down
Write down ten good things about being a nonsmoker - and then write out ten bad things about smoking. Do it. It really helps.
10. Don’t Pretend
Don't pretend smoking wasn't enjoyable – it was. This is like losing a good friend – and it's okay to grieve the loss. Feel that grief, don't worry, it's okay. Feel, and you heal. Stay with it - you can do it!
11. Affirm Yourself
Several times a day, quietly repeat to yourself the affirmation, "I am a nonsmoker." Many quitters see themselves as smokers who are just not smoking for the moment. They have a self-image as smokers who still want a cigarette.
Silently repeating the affirmation "I am a nonsmoker" will help you change your view of yourself, and, even if it may seem silly to you, this is actually useful. Use it!
12. Holding Out
Here is perhaps the most valuable information among these points. In Phase 2, the period which begins a few weeks after quitting, the urges to smoke will subside considerably.
However, it's vital to understand that from time to time, you will still be suddenly overwhelmed with a desire for "just one cigarette." This will happen unexpectedly, during moments of stress, whether negative stress or positive (at a party, or on vacation). If you are unprepared to resist, succumbing to that "one cigarette" will lead you directly back to smoking.
Remember the following secret: in these surprise attacks during Phase 2 - and they will definitely come - do your deep breathing, and hold on for five minutes, and the urge will pass.
In conclusion
Remember that if you quit you will live longer and feel better. Quitting will lower your chances of having a heart attack, stroke, or cancer. The people you live with, especially children, will be healthier. If you are pregnant, you will improve your chances of having a healthy baby. And you will have extra money to spend on things other than cigarettes.
So get the information and support you need to make the stopping process a little easier. Seek the help of family and friends, and most important decide you want to do it and visualize yourself as a non-smoker.
 Every bride desires her skin to look flawless and radiant on her wedding day. While you're busy picking your wedding outfit, sending out invitations and making arrangements for the guests who're about to pour in, don't forget to take some time off your crazy routine to indulge in some bridal skin care which will help you look absolutely stunning on your wedding day!
 As you grow older, signs of aging will start appearing everywhere on your face. Once these fine lines and wrinkles
 These days’ people like to change with fashion because they want to appear exceptionally different and also feel young always with fair and glowing skin.
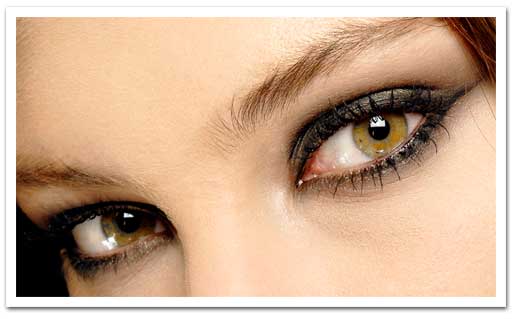
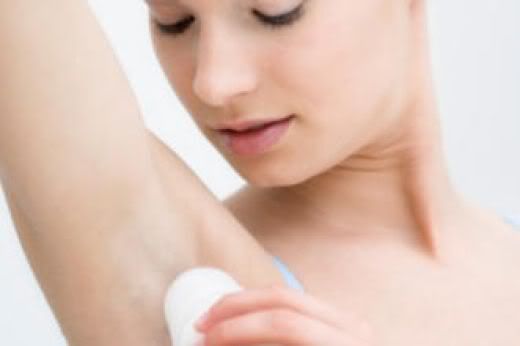 Whether or not you wear sleeveless dresses, removing underarm hair is quite important for a number of reasons. Firstly, of course, it isn’t very aesthetically pleasing to see a thick growth of hair under the arms ruining your overall appeal, especially with sleeveless dresses. Apart from the aesthetic point of view, this hair growth causes some other problems as the sweat remains trapped in the hair thus helping the odor causing bacteria to survive and flourish in your armpits.
 Acne is a very common problem in the modern times, especially amongst the teenagers, during adolescence. Acne lesions mainly appear on the surface of the skin in the form of blemishes, pimples, spots.
 SPA AT HOME
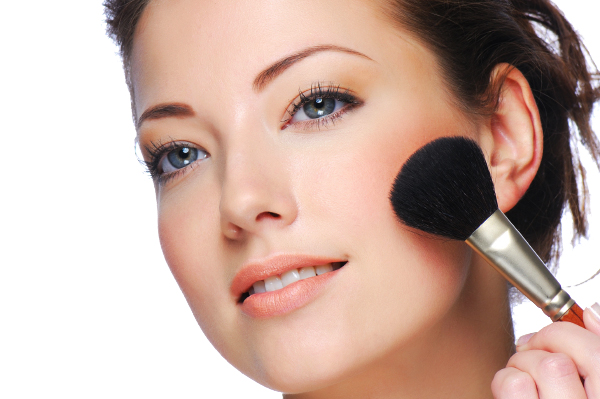 Here are some great beauty tips that will help you look simply gorgeous. So get into the groove and sweep the world off its feet!
 * Always remember that while using the cosmetics on a daily basis you should use only quality products.
 Here's a quick guide you can follow to help flatten your stomach. Print this list out and post it somewhere in your house where you'll see it.
 There is one thing that no one can avoid: that is aging. As we grow older, our skin droops and wrinkles start appearing, with furrows and lines. The effect of aging on the skin depends on your skin type.
 What is the most important feature of your face? It is none other than the eyebrows. This small part of your face actually balances the entire look of the face. They bring the focus to our eyes and they need to be taken care of properly.
 Here are some great beauty tips that will help you look simply gorgeous. So get into the groove and sweep the world off its feet!
 As the name itself indicates, foundation is what lends the basic structure to any makeup.
 If you have got it, you should flaunt it. Many times you have seen admired and envied the bust lines and the cleavage of the Hollywood superstars and wondered how come their breasts are so fuller and appealing? However this is no magic.
 Aging is an unstoppable process you cannot stop it and also cannot reduce the number of candles on your birth day cake. About this does not mean you have to look aged and haggard.
 Acne never picks the right time to rear its ugly head. (Wait, there really isn't a right time, is there?) Most times you just want to start to treat the pimple instead of running out to the store to find an acne treatment.
 There is nothing better than treating yourself to a proffesional manicure or pedicure,but you can save money by doing it yourself at home.These tips will take your nails from ragged to refined in no time.
 Every person in this universe likes to make oneself beautiful. From the face to the legs every part of the body needs to be nurtured in order to be perfect. If you had gone to the parlor before, you would have heard the name of waxing. This is a process though which unwanted hairs of the body are removed and it makes the skin feel like a satin cloth. It is very much costly to wax at the parlor. So if you try to wax at home by these simple tips then it would be of great help.
 Blackheads one your nose cannot be removed forever. They keep coming back and you have to remove them every time. It is a very irritating job for sure. However, if you don’t remove those blackheads it looks really odd and your face becomes dull. All your makeup and glow become useless for those blackheads on the nose. However, there are lots of tricks to deal with those ugly spots. You just have to be patient and remove those blackheads before they grow darker. Blackheads should be removed when they are young, as it is easy to remove them at that stage. Once they grow darker and stronger, it become tough to clean them. Some tricks to remove blackheads are given below. Check them out and clean your nose properly.
 Lips are undoubtedly the most sensuous aspect of the face. And while, nearly every other woman uses a lipstick to enhance the beauty of her lips, most of the women still don’t realize that giving your lips the right shape with makeup is the most important part of lip makeup.
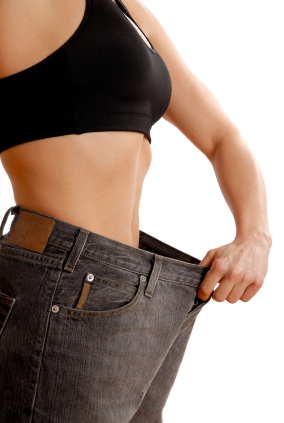 The summer is at its peak, and even though you love swimming, you haven’t gone swimming even once all through the season, just because you can’t fit into that favorite swimsuit of yours.
 Summer is no longer the most crucial period in fight against excess weight, as you should think about it earlier.
 If you take a closer look at the market for hair care treatments, you are sure to realize that there are tons of them.
 Are you are fed up with the oily skin that you have? Well – if you are, take heart. You are not the only one, as there are many like you who face the same problem. The good news is that plenty of things can be done to reduce the skin problems and get a clear complexion.
 Whether or not you wear sleeveless dresses, removing underarm hair is quite important for a number of reasons. Firstly, of course, it isn’t very aesthetically pleasing to see a thick growth of hair under the arms ruining your overall appeal, especially with sleeveless dresses. Apart from the aesthetic point of view, this hair growth causes some other problems as the sweat remains trapped in the hair thus helping the odor causing bacteria to survive and flourish in your armpits.
 Makeup exists for nearly all skin types and all skin tones, so even if you’re dark skinned, using makeup to accentuate your beauty should not pose any problems.
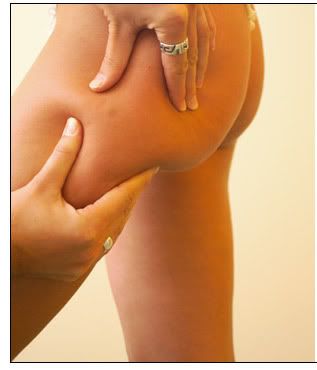 Cellulite is a persistent problem among many women. The ripping fat that gets deposited at your bum is called cellulite and is caused by the deposition of the fat cells in the epidermis. Cellulite is strictly genetics and hence whatever you do they are sure to return.
 Acne has a bad reputation of occurring at the worst time. Nothing can be worse than breaking into acne just the night before your big day.
 Make a paste of sandalwood powder and rosewater to be left overnight on the scars. Even a paste of sandalwood and black gram paste works wonders in removing acne scars. If you suffer from dark acne scars, you can use lemon juice to remove the scars.
