 Dandruff is the most widespread hair problem especially among men. If you ever had dandruff, also known as scurf, you know what it’s like – irritated scalp and itches, flaky skin and constant wondering whether to wear black or not. Many people err to believe that dandruff is caused by dry skin, frequent head washing or poor hygiene. These popular myths can lead to ineffective and often – inappropriate treatment and even worsen the situation.
Dandruff has a negative impact on one’s self esteem, and people suffering from that condition are usually more sensitive about their appearance than the rest.
What causes dandruff?
Dandruff is caused by a type of fungus – Pityrosporum ovale. Upon a normal organism state is does not cause any problems.
However when the skin pH balance in the hairy part of the head is broken and the environment is alkalized, the fungus starts to breed faster and due to the more frequent change of skin cells it leads to peeling.
The cause of the accelerated fungus growth has not been found, but the most probable causes are increased fat secretion by the organism, hormonal disbalance, stress, different ill-conditions of the nervous system, suppressed immune system, oversensitivity to the fungus itself or even inherited susceptibility to dandruff. In rare cases dandruff can be a manifestation of an allergic reaction to some of the chemicals in hair gels, hair sprays, hair oils or other hair products.
Very few people know that there are two forms of dandruff – external and internal. External dandruff is caused by excessive use of hair products - sprays and gels, improper use of hair-coloring products, excessive use of hair curlers or hair straighteners, cold weather, dry indoor heating, stress, infrequent shampooing of the hair or inadequate rinsing of the scalp. Internal dandruff can be caused by hormonal imbalance, emotional stress, poor health, poor hygiene, allergy to some foods, lack of rest, excessive consumption of sugar, fat and starch and hereditary predisposition.
Even though there is a lot more to be found about dandruff, what is unquestionably known about it is that it is a medical, rather than a cosmetic problem.
What are the symptoms of dandruff?
* white, oily flakes of dead skin
* itchy, scaling scalp
* too dry or too oily hair
* greasy skin covered with flaky white, or yellow scales.
How to treat dandruff?
In most cases it is not necessary to consult the presence of dandruff with a physician. Dandruff is a chronic condition which can almost always be controlled, even though it requires patience and persistence.
It is always recommended to use a special medical shampoo which can be found in your local pharmacy.
There are several types of commercially available shampoos, containing active dandruff fighting ingredients. However there are not enough convincing researches related to them so they are not registered as medical products, but as cosmetic shampoos.
The most anti-dandruff products contain active ingredients such as: Sodium bicarbonate, Zinc pyrithione , Salicylic acid , Selenium sulfide, Tea tree oil , Tar.
The most effective substance, and most recommended by dermatologists worldwide, is ketoconazole – also known as Nizoral (most often in 2% concentration) which is known in the area of medicine with its wide specter efficiency in treatment and prevention of seborrheic dermatitis, dandruff, lichen planus and other fungus skin diseases.
The effect of ketoconazole has been repeatedly and thoroughly researched. Researches of its efficiency against different types of fungus show that ketokonasol breaks the fungus cell wall, which leads to its extermination.
What should I use?
Ketosal could be the answer. It is a medical shampoo with 2% content of ketokonasol that can keep your dandruff under control, so you won’t be constantly checking on your shoulders. Ketosal can stop the fungus breeding cycle.
Once the fungus is under control – so is your dandruff. Besides it has all the benefits of a “regular” luxurious shampoo – nice fragrance, silk sensation in your hand and washes your hair perfectly.
Ketosal also has no negative impact on dyed, white or treated hair. Use it twice weekly to treat your hear and your hair will be shiny, easy to shape, vigorous and with volume. And of course – dandruff free!
What else do you need to know?
Remember: Dandruff is due to the excessive shedding of dead skin cells from the scalp.
Remember: sometimes dandruff may be a symptom of seborrhoeic dermatitis, psoriasis, fungal infection.
Remember: When using anti-dandruff shampoo be sure to leave the shampoo on for at least five minutes — this allows the ingredients time to work.
Remember: In general, mild scaling can often be helped by daily cleansing with a gentle shampoo to reduce oiliness and cell buildup.
Remember: Sometimes scaling can occur anywhere on the scalp, in the hair, on the eyebrows, the beard and can spread to the neck and shoulders.
If your dandruff is mild, wash your hair regularly to remove the excess flakes.
When you apply the shampoo, massage your scalp with your fingers to remove dead skin and improve blood circulation.
Avoid prolonged sun exposure, especially in mid-day – ultraviolet rays can damage your hair.
Always wash your hair with clean water after you have been to the pool or in a natural basin with contaminated water, even the sea.
A diet that provides enough zinc, vitamins and minerals, and essential fatty acid may help prevent dandruff.
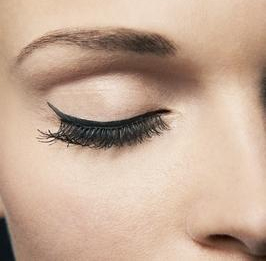 Applying eyeliner is one of the most preferred ways to emphasize a woman’s eyes. No matter whether you will use liquid eyeliner or pencil eyeliner you can easily define your eyes and create a classy look. Although most of the women prefer to use pencil eyeliner as it is much easier for them, the liquid eyeliner is also a great choice for the rest of the women. Before you decide you buy liquid eyeliner you should know that it can be very difficult to apply it flawlessly at first as it needs a lot of practice and patience.
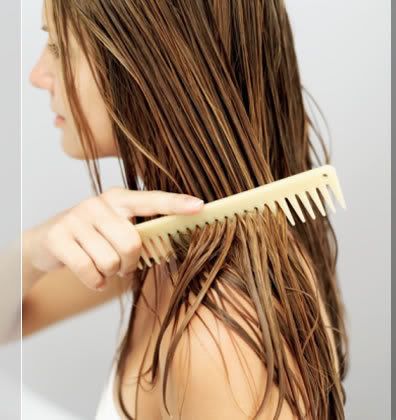
 The first thing you should do is to comb the tangles out of the hair before you wet it so the hair would wash easily and the tangles would not worsen. And then, wet your hair thoroughly under the shower. You can use either warm or cold water if you like, but for best results, you can wet your hair with warm water to open the scale-like cuticles of the hair and wash all the oil and dirt off. And then, you can rinse your hair with cold water afterwards to close the cuticles and add to the shine of your hair.
 In most cases, cheap toothpaste doesn't cut it. An expensive toothpaste is often needed for a brighter smile. Unfortunately, getting your teeth whitened professionally is not an option for everyone. If you want to forego the creams, bleaches, trays, and gels found in drugstores, you can take the natural approach and use any of the following home remedies for whiter teeth that are both cheap and effective.


