Thursday, July 31, 2008

Eyebrow Shape and Shades For Your Face

Leave a Comment
Eyebrow shapes nonverbally express simple facial features that highlight individual personality. So choose and create perfect eyebrow shapes with right shades that transcend the beauty of your face. Own the shape you always admired with these useful tips.

Eyebrow Shape and Shades For Your Face

Some useful tips to remember while shaping your eyebrows.

* The primary rule of shaping the eyebrow is that the tweezers should have slant edges and rough textured point. Make sure to replace them every year.
* Main features of face such as mouth, eyes and eyebrows are never balanced symmetrically. Therefore while doing your brows it is important to bring all the features into balance with each other in order to produce a proportioned look.
* Before shaping the eyebrows always remember to spray a little hair spray on your brows and brush them using your toothbrush to keep them in place.
* Wipe the brow area with a cotton ball soaked in astringent before tweezing your brow, as the cooling effect will help you not to feel much pain due to numbness.
* Eyebrow should be shaped according to the natural line of your brow bone.
* It should extend and taper slightly beyond the eye.
* The arch should be highest at the outer corner of the pupil.
* Avoid slanting upward eyebrows as they give angry look on your face.
* To add volume to your brows, use stiff slanted brush to apply eye shadow in short gentle strokes.
* People with thin brows can apply little colour to the top of each eyebrow and brush it in place for denser look.

Perfect eyebrow shapes


* Angular eyebrow shape works well for those with round face.
* Round fuller eyebrow is suitable for woman with large eyes or wide forehead. These brows should follow the frontal bone and taper gently. A heart shape face can also be emphasized with slightly rounded eyebrows with sharp angles.
* Women with wider jaws and round cheek should go for arched shape eyebrows like many celebrities. It gives width and expression to the eye and balances prominent nose or a large mouth.
* Low arched shape is appropriate for those with small forehead as it gives illusion of more length.

Brow shades

Eyebrow colour can either dominate your face or disappear entirely. So, be careful when you are using brow shades. Here are some of the shades for your help.

* Olive complexion women can use tawny or brown brow shades
* Dark African-American complexion women can use gray shades
* Fair complexion women can use blonde shades
Read More...

Manicure your nails for good ones

Leave a Comment
Manicure your nails for good ones  The nail is made of a hard protein called keratin. A protein is one of the building blocks that make up the body. The nails help protect the ends of the fingers and toes from trauma and also help us pick up small objects. Over the last hundred years, the nails have become more important for cosmetic reasons and less important for protection. Manicuring is the care of the hands and nails. Basic manicuring should be done once a week. Every 4-6 weeks it is a good idea to seek the services of a professional manicurist. A professional manicurist best knows how to keep your nails looking healthy and beautiful.

Weekly Nail Care (15-20 minutes each week)

* Remove any old nail polish. To remove the old polish, first moisten cotton with nail polish remover and press over the nail for a few seconds to soften the polish. Then with a firm movement, bring the cotton from the base of the nail to the tip. Repeat this process until all of the polish is gone.
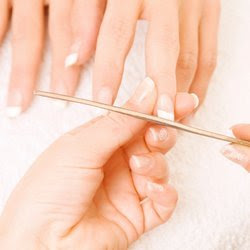
* Shape the nail, using a file or emery board. File each nail tip from corner to center; do not file in a see-saw motion with the emery board because doing so can cause ridges in the nail and nail splitting.
* Soak the hands in warm, soapy water for a few minutes to remove dirt. Clean under free edge of nail with orangewood stick. Nail Care
* The cuticle is the skin that grows from the finger onto the base of the nail (nail root). We recommend that the cuticle should not be pushed back. Leaving the cuticle intact helps to prevent infection of the nail growing tissue.
* Now apply clear nail polish. There is no reason to waste money on several different kinds of clear polishes such as a ridgefiller, base coat, topcoat or nail strengthener. They all do about the same job. After the clear polish dries, apply a color polish of your choice if you wish. Let dry. You may then reapply the clear polish as a topcoat. This will help strengthen the nail and prevent chipping of the nail polish.
* Finally, apply a moisturizing cream or lotion to the hands and cuticles. This will help prevent splitting of the nails.

Manicure at home - A simple cleaning routine

* Soak the hands in warm, soapy water for a few minutes to remove dirt. Clean under free edge of nail with a blunt edged stick.
* Remove traces of the old nail polish. To remove the stain, first moisten cotton with nail polish remover and press over the nail for a few seconds to soften the polish. Then with a firm movement, bring the cotton from the base of the nail to the tip. Repeat this process until all of the polish is gone.
* Shape the nail, using a filer. File each nail tip from corner to centre; do not file in a see-saw motion with the filer because doing so can cause ridges in the nail and nail splitting.
* The cuticle is the skin that grows from the finger onto the base of the nail (nail root). We recommend that the cuticle not be pushed back. Leaving the cuticle intact helps to prevent infection of the nail growing tissue.
* Now apply clear nail polish. There is no reason to waste money on several different kinds of clear polishes such as base coat, topcoat or nail strengthener. They all do about the same job. After the clear polish dries, apply a colour polish of your choice if you wish. Let it dry. You may then reapply the clear polish as a topcoat. This will help strengthen the nail and prevent chipping of the nail polish.
* Finally, apply a moisturising cream or lotion to the hands and cuticles. This will help prevent splitting of the nails.

Painting your nails

* Paint nails in a well-ventilated room (e.g. near an open window or switch on a fan).
* Shake the bottle of polish well or roll between your palms before opening.
* Apply a layer of base coat (clear nail polish will also do) before painting over with a coloured polish.
* Give every nail 3 strokes of polish; starting either from the centre-left-right or from right-centre-left, it's really your preference.
* Two layers of nail polish is enough on each nail. Too many layers could just turn messy.
* Allow the polish to dry in between coats - it prevents the trapping of air bubbles and allows each coat to stay smooth.
* Add a top coat (clear nail polish) to protect the polish and keep nail under wraps away from the sun.
* Storing nail polish in a refrigerator can keep its consistency just right.
* Never peel or scrape off nail polish or use metal instruments on the nail surface to push back the cuticles. This can scrape off the protective cells of the nail surface.

Keep your nails out of your mouth! Biting nails can damage the nail and the cuticle leading to a deformed nail shape or uneven nail growth. You can also transfer harmful organisms to the nail that lead to infection or even increase one's chance of catching a cold or flu.
Read More...

Home Mask For Weak And Dry Hair

Leave a Comment
Home Mask For Weak And Dry Hair
A good remedy for weak and dry hair is the hair mask with lemon juice. You will need: 2 tbsp. castor oil /or almond oil/, 1 tbsp. fresh lemon juice and 1 tbsp. honey.

Add the honey and the castor oil to the lemon juice. Mix all the ingredients well and apply the mixture generously first to the roots and then to the entire length of the hair. Wrap your hair with a towel. Leave the mask on for approximately one and a half hour.

Use gentle shampoo and wash your beautiful hair. Do the mask twice to achieve best results - the mask will nourish and hydrate your hair deeply, while making it appear healthier and more shining.
Read More...

Skin Care In Monsoon

Leave a Comment
Cleansing: Your skin will require regular cleansing in order to keep it looking fresh and healthy. Follow these home remedies.

Dry Skin: You can use almond paste or honey cleanser. Take ten crushed almonds and make a paste and add two tsp of honey. Massage on face for 5 to 7 minutes, rinse face and pat dry.

Oily Skin: You need a very mild cleanser to get the dead cells and grime off from skin. Use pure oatmeal scrub to cleanse oily skin or use ripe papaya pulp as a mild exfoliant.

Toning: It’s a must at night. During monsoon, a lot of airborne and waterborne microbes are let loose. So a good anti-bacterial toner will go a long way to prevent skin infections and eruptions. It is a good idea to get anti-bacterial face wash too. You need to mildly tone a dry skin since the pore size is small. Use five drops chamomile oil in a one tsp milk to tone dry skin and ten drops Lavender oil in one tsp water to tone an oily skin.

Moisturising: During monsoon, moisturising is as important as it is in summer. Monsoons can mean a de-moisturising effect on dry skin and an over-hydrating effect on oily skin. The skin gets wet often and with the constant wetting and drying, a lot of dehydration (yes, in the rains!) takes place. That explains the itchy feeling one gets during monsoons. Use a non-water based moisturiser, if you happen to get wet often. Otherwise a water- based moisturiser will do.

Dry Skin: Take I tsp honey, I tsp fresh curd and I tsp jojoba oil. Mix all of these together and apply on your face and neck. Leave it on for 10 mins and then wash off with plenty of water.

Oily and Combination Skin: In 2 tsp rose water add 2 drops of strawberry oil and fresh orange oil. Mix and apply on face and neck for 10 mins and then wash off.

Makeup: Make skincare your makeup during the monsoon. Clean skin with less makeup is the best way to brace yourself for a rainy day. Mix a few drops of foundation in water-based moisturizer. For a light weight canvas treat foundation like a moisturizer and smooth over clean skin till it completely disappears. The use of loose powders and oil-based products should be kept minimal during the rain.

Tweak, pluck or thread your eyebrows in the correct shape, as an eyebrow pencil is not recommended during a downpour. Keep eye makeup light and moisturize lips with lip conditioner at regular intervals.

If you must use colour on your cheek, opt for a cream based blusher. Apply it sparingly and blend well into the skin. For the eyes use waterproof mascara and eye pencil.
Read More...

Dark underarms

Leave a Comment

How to get rid of Dark underarms


How to get rid of Dark underarms


Tips 1:

Take 1 tspn of Cucumber juice, 1 tspn of Limejuice and a pinch of Turmeric powder. Apply and leave for 20 minutes before washing.

Tips 2:

Apply a paste of 1 tspn of Gram flour, a pinch of Turmeric powder and 1 tspn of Sandalwood powder, some limejuice and milk. Wash after 20 minutes.

Read More...

Wednesday, July 23, 2008

Get that slim look!

Leave a Comment
Bootcut pants create an illusion of height and longer legs. Steer clear if you are below 5'5, as they tend to make you look shorter. Bootcut pants flatter any body type.

Never go by the size specifications on the tag. Make sure you try on a variety of sizes to earn the best fit. Also keep in mind that wearing something that's too small for you can make you look a lot bigger than you actually are.

While wearing a pair of trouser or skirt, ensure that they are long. The longer the better, as they create an illusion of slimmer look. Shoes can affect the way you look too.

Rounded platforms give you a stumpy look, while stilettos can be uncomfortable; therefore go for the pointed toe shoes or flats or slight heels. Your secret weapon would be the darker colours. While black is a favourite, charcoal, navy blue or deeper shades of maroon make great allies as well.

Do not dress in one uniform colour. Pair dark pants with a funky top and vise versa. Never ever go in for clingy clothes! Flowy fabrics in light shades are better than just complimentary. While doing all this, do focus on your assets as everyone has been blessed with plenty of them. They only need playing up. Flaunt them and continue turning heads!

  • Source: India syndicate

  • Read More...

    Seductive Make-up Trends

    Leave a Comment
    Looking for makeup lessons in the art of seduction? The faces on the New York runways for Fall 08 had it all- a bit of shimmer and an overall embrace of rich. Read on to get the latest in international make up trends.

    The look for this season is smudgy, blended, slightly slept in shadow and yes the lips to be painted red for kissing or bitten-stained into kissed-off rouge was pretty much the definitive trend of the week.

    Last season’s fake colors and matte textures was sidelined and replaced with super blended naturally inspired pigments (desert golds, wine reds, midnight blues, and leaf greens).

    Just remember to have layers of pigments, an attitude radiating sultry sophistication, play of textures, a little bit of shimmer and an overall embrace of rich, wintery tones notwithstanding, are what look to be setting the pace into. That’s the look this season.
    The models at the New York runways had put on royal blue, purple and dark burgundy on the eyes and outer edges of the eyes were smudged out to give a deep dimensional and dramatical look.

    The indulgence wasn’t limited to the eyes, there was staining of lips in Night Moth and Deep Wine lipsticks. For the skin they had put M•A•C’s soon to be released Prep+Prime Instant Line Filler, which kicks out shine but keeps up on transparency. What went missing quite conspicuously at the fashion week was lavish mascara. The lids were looking blank and bald.
    Read More...

    How to get Your Own Lucky Lips!

    Leave a Comment
    How to get Your Own Lucky Lips!When lips have to do the talking, make sure you create an impact with sexy lips! Devil red or chocolate brown; matt or glitter kissed!

    Suitable Shades

    For those with fair complexion, there are a whole lot of shades you can try. Go for pinks, natural shades, blood red and dark brown and peach. Wear bright shades for the day and darker ones at night.

    Coffee, caramel, magenta and lilac shades are for those with medium or tanned skin. Coffee and caramel look great on dark skin too. If you love metallic shades, pick copper over gold or silver. Lilac and purple shades will make you look like you have been poisoned, so avoid.

    Always pick shades according to the occasion. Wearing a metallic shade for a job interview is not going to impress the boss!

    Wear it Right

    * Step 1: Moisturise your lips with a lip balm or a lip conditioner. If you are out of both, use normal face moisturiser.
    * Step 2: Create an outline using a lip pencil or a lip liner. Make sure you choose a shade lighter than your lipstick. Start by making a 'v' in the upper lip and then move on to the corners.
    * Step 3: Fill your lips with the colour of your choice, preferably using a lip brush. Use lip gloss to add shine and make your lips appealing for special occasions.

    Glossy Lips

    Gloss looks great but make sure to choose a shade that is close to you skin tone. To bring out your sensuality, use natural shades the way Bipasha Basu did in 'Jism'. To prevent gloss from running out, make sure you line your lips using a lip liner. When filling gloss, start from the upper lip and then move to the lower lip.

    Never use too much gloss; just fill on the inner side of lips.


    # Source: Indiwo
    Read More...

    Clear Skin Before Your Wedding

    1 comment

    Don't depend on make-up to conceal those acne scars on your wedding day. If you have three months at hand, then there a lot you can do to get gorgeous skin. Get the best treatment and follow a healthy diet, here what you need to do for clear skin…

    Skin Analysis

    The first and the most important thing to do is visit a dermatologist, who will check your scars and will then recommend the required the suitable treatment. There are three basic types of scars, which require their particular type of treatment…

    You could have superficial scars, which are only on the surface and can be healed by proper medication and diet. For such scars dermatologist recommend microdermabrasion, which is a procedure used to cure scars.

    If you have deeper scars you will have to go through a treatment that will remove the dead cells from below the top layer of your skin making way for new cells. But in case of very severe scars you may have to undergo a surgery. The surgery will remove the dead cells and fill the space with filler, similar to those used in wrinkle lift creams.

    Start your treatment the day you decide to get married. It is best to start these treatments six months in advance, but if you don't have enough time start the treatment now and continue even after marriage. The treatments start showing on the skin.

    Hydrotherapy

    'I drink lots of water' - heard these line before? Most fashion models never fail to mention this when asked about their beauty regime. Water will flush out all the toxins from your body making it look fresh. So make a habit to drink about two liters of water per day.

    Diet do and don'ts

    Fruits and vegetable always help to keep skin healthy, but if you are looking for something in particular here are some foods that will help…

    * Aloe Vera Juice
    * Proteins will be good, but not too much, include just about 40gms per day.
    * Carbohydrates
    * Also include a lot of coloured vegetables in your diet, as they act as anti-oxidants.
    * Make sure you don't have too many sweets. If there is an excess intake of sugar, it can delay healing. That means the time required for your scars to heal will be doubled!

    Beauty Regime

    Make-up doesn't always help the skin. If you are undergoing a treatment it is better to avoid it or use only eye and lip make-up. If have dry skin don't forget to use a moisturiser.' Also use a sunscreen, as the UV rays might disrupt the healing process.

    Follow these tips and medical treatement regularly and your scars will vanish forever.


    # Source: Indiwo
    Read More...

    How to Choose The Right Sunglasses

    Leave a Comment
    How to Choose The Right Sunglasses
    The sunglass size should be in proportion with the face size. This means that smaller sunglasses are best for smaller faces; larger sunglasses for larger faces. The frame shape should contrast with, that is, be the opposite of, the shape of the face. These tips must not be taken as rules but they can help you to choose your right frame.

    Oval face
    Almost any style works for oval face. Experiment with the latest looks, such as wraparounds or shields. Square shaped frames with gently rounded edges and higher temples also look good on an oval face.
    Frame suggestions : Any frame shape


    Round face
    Frames should make the face appear longer and thinner. In general, look for frames equal to or slightly wider than the broadest part of the face. Minimize the curves and add definition with soft, angular, rectangular styles or double brow styles. Higher temples will create a longer profile. Sunglasses with brow bars also pull the eye upward, making the face appear longer.
    Frame suggestions : Wider frames with angular / rectangular styles.


    Diamond shape
    This face shape has wide or high cheekbones with a narrow forehead and chin. Oval sunglasses will soften the contour of the face, although softly curved square frames will work as well. Make sure the styles are no wider than the top of the cheekbones.
    Frame suggestions: Oval, Square, Rimless.


    Square face
    This face shape consists of a strong jawline, a broad forehead and wide cheekbones. Reduce the angles with soft, curvy styles that will give the face some definition such as cat-eye styles. The classic oval also works well for this face shape.
    Frame suggestions: Oval, Round, Cat Eyes.


    Oblong face
    Widen and shorten the face with sunglass styles that do not extend beyond the widest part of the face. Round or square shapes will look great on this face. Frames with short horizontal and long vertical lines also work. Decorative or contrasting temples add width to the face.
    Frame suggestions: Round, Square


    Triangle shape
    This face has a narrow jaw and a wide forehead. Soften the lower portion of the face by accenting the eye area. Styles such as cat- eyes should angle outward at the top corner and be wide enough to balance the jawline. You can also try metal frames with rimless bottoms.
    Frame suggestions: Frames with a Straight Top Line, Cat Eyes


    Skin Tones

    * Pale complexions: Try lightweight frames or those with a touch of colour such as rose or amber. Tortoiseshell frames suit fair complexions (avoid darker versions) but clear, blue or green tinged frames tend to drain colour from cheeks.
    * Dark complexions: Olive, Mediterranean, Golden or Asian skin and dark hair can look stunning in silver, gold or clear frames – but avoid black which can be too heavy.
    * Black Skins: All metallic frames suit black skins and amber often works well – be very careful with black frames, which can look spectacular or awful!
    Read More...

    Make your Face skin look younger with Fruits

    Leave a Comment
    Make your Face skin look younger with Fruits.Have you ever thought what fruits can do for your skin? If not, a simple fruit face pack can do wonders to maintain. So go ahead and make your skin look younger with a healthy natural glow!

    The best thing about fruit packs is that you don't have to invest in all those expensive brands. You can make your own fruit packs at home and have smooth, supple skin always. You get good treatments at your salon, but if you want a quick fix therapy, you can make some packs at home too. Here are some simple and easy to make fruit packs.

    * Oily Skin: If you have oily skin, firstly use a tomato slice on your face and rinse off with water. This works like a fresh astringent and closes the pores. Next use Orange, as it removes the impurities caused by greasiness. It also gives a glow without looking greasy. Take half a teaspoon of orange juice, add four to five drops of lime juice, add half a teaspoon of multani mitti (Fullers Earth), half a teaspoon of sandalwood powder, a few drops of rosewater and mix it well. Refrigerate it for a little while if you wish. Mix well, apply it and keep it on for 15-20 minutes and rinse off with water.
    * Dry Skin: Banana is good for your skin as it acts as a moisturiser and softens the skin. Mash a small banana, add half teaspoon of sandalwood powder, add six to seven drops of honey. Add half a teaspoon of malai and a pinch of haldi powder. Haldi brightens your skin. Mix well, apply and keep it on for 15-20 minutes. Rinse it off with plain water.
    * Combination Skin: If you have this skin type, your T-zone is usually oily and the C-zone is dry. This means, your forehead and cheeks are dry and the rest is oily. So here, you can use the oily skin pack for the portion that is oily and the dry skin pack for the part that is dry.
    * Normal Skin: If you have normal or 'fresh skin', pomegranate will work well for you. Take half teaspoon of pomegranate juice; use a little piece of banana, add half a teaspoon of sweet lime, a pinch of haldi powder, a pinch of multani mitti and half a teaspoon of sandalwood powder. Mix well and apply. Keep it on for 15-20 minutes and rinse off with plain water. If you are unable to get pomegranate, you can use cucumber instead.
    Read More...

    Hair Color Guide Tips

    Leave a Comment
    Hair Color Guide TipsCheck out how you can sync your streaks with your hairstyle and how to pick the best all-over hue for you. If you have…

    * Short hair: If your coils stops around your chin, blend half-inch sections of colour all around your head to add depth, enhancing your the shape of your cut.
    * Shoulder-length hair: Create the illusion of layers with a few quarter-inch to half-inch streaks of color around your face.
    * Long locks: Weave in lots of skinny, 1/8-inch strips all over the top layer of your hair, which will accentuate the length of your tresses.

    Pick the Best Hue

    * Blond: A warm gold or rich honey shade will brighten your base and help blend in any existing highlights. Do a monthly gloss treatment to add extra sheen all over.
    * Redhead: Overly coppery hues can make a pale complexion seem ruddy, and if you have freckles, forget about it. Stick to more becoming shades of auburn and amber.
    * Brunette: Go two tones darker than your roots — otherwise you’ll end up with a wishy-washy brown. Deep chocolate and coffee shades add just the right amount of intensity.

    Maintaining the Look

    * Daily: Mist damp hair with a hydrating spray to protect the cuticle and guard against drying UV damage.
    * Weekly: Enhance your hue with a fast deep-conditioning treatment.
    * Monthly: Get a quick trim to rid yourself of dull, frayed ends, as they draw attention to damage and away from the healthy, shimmering areas.
    * All Season Long: Chlorine is like kryptonite for color-treated hair. Either wear a swim cap or do a post pool rinse with club soda (it’s more effective than tap water).
    Read More...

    Friday, July 18, 2008

    Homemade Hair Care Tips

    Leave a Comment
    Homemade Hair Care Tips Want to soften hair and leave it shiny? Then mayonnaise is the conditioning condiment for you. Comb just enough mayo through your hair to coat it lightly. Then leave on for 30 minutes before shampooing out per normal. For a deeper conditioning treatment, place a shower cap on top of your mayo-coated locks and leave on for longer (even overnight if you’re feeling extra dry). Other interesting uses? Next time you get gum stuck in your hair, rub Mayo in until the gum dissolves right out
    Vinegar
    Used for centuries as health tonic, this tasty, tangy acid can help remove residue that dulls your hair. Add about a tablespoon of vinegar to your hair as you rinse it. And if you have an itchy scalp or dandruff, try massaging full-strength apple cider vinegar into your scalp before shampooing. In addition to adding shine to your hair, vinegar is also known for its skin healing properties.
    Eggs
    Finally! A way to benefit from eggs' natural proteins without the cholesterol! Crack a few eggs and beat together in bowl. After shampooing, massage through your hair and leave on before rinsing out thoroughly. This treatment should help repair or strengthen your hair follicles -- leading to silkier locks with good body. Alternate ideas include whisking one egg yolk together with a dash of olive oil and 3/4 cups warm water.
    Read More...

    Homemade Facial Tips

    Leave a Comment
    Homemade Facial Tips

    Honey for Best Facial

    The best facial mask that i have found is honey. Use warm cloth to open pores, smear on honey, leave on 15 to 30 minutes, rinse off with warm water, and then use cold water to close pores. Use for 3 days in a row and then once a week. Sometimes I mix a little gound oatmeal with the honey, which makes a great mask.

    For an easy exfoliating mask, mix three tablespoons olive oil or any good oil and one tablespoon kosher salt mix and gently rub into dry skin. Do not use around eye area. This works great on elbows and feet, but it can also be used on cheeks and forehead

    For trouble-prone skin, mix oatmeal with water to form a paste.

    For normal to oily skin, use an egg white.

    For dry skin, use an egg yolk.

    In all cases, spread mixture on face and allow to dry. Rinse thoroughly with cool water.

    For oily skin, witch hazel makes an inexpensive toner.

    For dry skin, you may want to add moisturizer while skin is still damp
    The cheapest and best facial mask I have ever come up with is oatmeal processed to a powder in the blender and either skim milk or if you are trying to fade spots lemon juice. Really works well for me and I have dry skin
    Read More...

    Tuesday, July 15, 2008

    Shahnaz Hussain beauty tips

    1 comment
    Shahnaz Hussain beauty tips


    This is my collection of Shahnaz Hussain beauty tips. All these tips are safe and can be tried at home.

    Home Hair Cleanser: Take a handful each of dried reetha, amla and shikakai. Soak them in one litre water overnight. Next day, simmer the herbs on a low fire till the water reduces by half. Allow the mixture to cool and then strain it with a clean cloth. Use the liquid to wash hair. This quantity should be enough for four to five washes. Refrigerate it. Make small quantities at a time.

    Pimples occur on the oily areas of the skin. Therefore, applying cold cream can lead to further pimples. Mix one part of pure glycerine with four parts of rosewater and keep it in the fridge. Apply it on the face after washing and before applying it, add a few drops of lemon juice to it. Once daily, apply curd mixed with a little turmeric on the entire face, and wash it off with plenty of water after 20 minutes. Apply sandalwood paste on the pimples.

    Dandruff: Twice a week, heat pure coconut oil and apply it on the scalp at night, using cotton wool. Leave it on overnight. Next morning, apply the juice of a lemon on the scalp and wash your hair after half an hour. Apply henna once a week.

    Lifeless Hair: Once or twice a week, heat pure coconut oil and apply it on the scalp and hair. Then dip a towel in hot water, squeeze out the water and wrap the towel around your head like a turban. Keep it on for five minutes. Repeat the hot towel wrap three or four times. This helps the hair and the scalp absorb the oil better. Use a mild herbal shampoo. After each shampoo, apply a conditioner, massaging it lightly into the hair. Leave it on for two minutes before washing it off with water. You can have henna treatment thrice a month, adding four teaspoons each of lemon juice and coffee, two raw eggs, two teaspoons of oil and enough curd to the henna powder. It will make your hair look healthy and lustrous.

    Grey Hair: Amla is said to check greying. Have the juice of one raw amla after adding it to a glass of water. Also try adding amla to the henna powder. Henna turns white hair reddish brown. It will not colour dark hair. Soak a handful of dry amla in about two cups of water overnight. Next morning, strain the water, but do not throw the water away. Grind the amla. To the henna powder, add the ground amla, four teaspoons each of lemon juice and coffee, two raw eggs and enough amla water, so that the henna can be mixed into a thick paste. Apply it on the hair, covering the entire head. Keep it on for two hours and wash it off with water. It will also add shine and substance to the hair. Ask your doctor to prescribe Vitamins B-Complex and C.

    Oily Hair, Hair Loss: Excessive oiliness of the scalp can lead to hair loss. Wash your hair daily, using very little shampoo — one teaspoon for long hair and half teaspoon for short hair. Dilute it with a little water and use it. After washing, add the juice of a lemon to half a mug of water and use it as a last rinse. Have henna treatment once a week. Add four teaspoons each of lemon juice and coffee, two raw eggs and enough tea water to the henna powder and mix it into a thick paste. Apply it on the hair and wash it off after an hour. If you do not wish to use egg, add more tea water. For tea water, boil used tealeaves in water. Cool and strain before using. Include fresh fruits, raw salads and sprouts in your daily diet. Drink 6 to 8 glasses of water. Add the juice of a lemon to a glass of water and have it first thing in the morning.

    Dry, Lifeless Skin: Use a facial scrub once a week. For very dry skin, avoid soap and use a cleansing gel or cream. For the body, use a mild, glycerine soap. Apply sesame seed (til) oil on the body before your bath. Mix honey with egg yolk and a little milk and apply it daily on the face, washing it off with plain water after 20 minutes. At night, apply a good nourishing cream and massage it on the face with a few drops of water. Wipe it off with moist cotton wool. Apply sunscreen 20 minutes before going out in the sun. Til oil actually has sunscreen properties, but it is better to use a sunscreen lotion for proper protection. Aloe Vera is a powerful moisturiser and an anti-oxidant. It helps keep the skin soft and healthy. It is better to use moisturisers and creams containing aloe vera.

    Double Chin: exercises — open your mouth as wide as you can. Hold this position for about 10 seconds, then relax your mouth, and repeat the exercise a few more times. For faster results, add resistance by placing a tennis ball underneath your chin, while testing your jaw span. Sleeping without a pillow is said to help. Also, you can massage the area daily with a cream. Start from the chin and go downwards using both hands, one hand following the other.

    Oily T-Zone: either buy a facial scrub or mix rice powder with curd and use it as a scrub. You may add a little turmeric if you wish. Apply the scrub on the face, rubbing gently with small circular movements. Leave it on for five minutes and then wash it off. This will keep the pores free of clogged oil. Once daily, at any time, mix one teaspoon of honey with one teaspoon of lemon juice and egg white and apply it on the oily areas, washing it off after 20 minutes.

    Glowing Skin: After cleansing, wipe the face with rose water, using cotton wool and then pat it briskly. Use a face mask once or twice a week. You can make a mask at home with two teaspoons of choker, one teaspoon of oatmeal or ground almonds and one teaspoon each of curd, honey and egg white. Apply it on the face and wash it off after 20-30 minutes.

    Thin Waist: Join a gym or health club and lose weight under professional guidance. Or, practise yoga daily. You can also do the following exercises after seeking your doctor’s advice. First, lie on the floor on your back, feet together and arms at the sides. Lift your legs about six inches above the ground and hold this position for a count of ten. Then lower your legs to the floor. Repeat this exercise 3 to 4 times and increase gradually. Then, keep lying on the floor, the same way. Bend your knees and keep your feet flat on the floor. Raise your body to a half-sitting position, holding your arms stretched out before you. Lower your body to the floor and repeat 3 or 4 times. Take a look at your eating habits. Avoid eating desserts after meals and stick to fresh fruits. Take clear soups (without butter) and salads before the main dish. Avoid rich gravies. Cut down on your intake of cereals. For example, if you have been eating three chapatis, eat only two. Or, eat only one cup of cooked rice. Eat fresh fruits, salads, sprouts, curd and paneer made from skimmed milk and lightly cooked vegetables. If you feel like a snack, eat fruit, carrot or cucumber.

    Combination Skin, Pimples: In combination skins, usually the T-zone (forehead, nose and chin) is oily, while the rest of the face is dry. Pimples on the forehead can occur due to oiliness of the skin. You should wash the face only twice a day with a medicated soap. After washing, wipe the oily areas with rose water mixed with an astringent lotion in equal quantities. Use this two or three times a day. Avoid applying besan or multani mitti as they can sometimes clog the pores and cause pimples, blackheads or whiteheads, especially in pimple-prone skin. Add a little turmeric to curd and apply daily on the face, washing it off well with water after 20 minutes. Add a few drops of rose water to sandalwood paste and apply on the forehead and areas with spots. Keep it on for at least one hour.

    Dry Skin: If you wish to use soap, you can try a mild glycerine soap and see if it suits your skin. You should keep your skin well moisturised during the day, or if you are going out in the sun, apply a sunscreen. At night, use a nourishing cream, massaging it on the skin for two to three minutes. Massage the forehead too, starting from the bridge of the nose and using both hands. Go upwards and then in an arc on either side, go towards the temples. Wipe off with moist cotton wool. Once daily, mix one teaspoon honey with egg white and apply on the skin, washing off with plain water after 20 minutes.

    Blackheads: the daily use of a facial scrub will help. You can either buy a facial scrub, or you can mix rice powder with curd or rose water and use as a facial scrub. Apply on the face and rub gently on the skin using small circular movements. Concentrate on the blackhead prone areas. Leave on for five minutes and then wash off with water. Once daily, mix honey and lemon juice in equal quantities with egg white and apply on the face, washing it off after 20 minutes.
    Read More...

    Sunday, July 13, 2008

    Make Up Tips To Reduce Dark Circles

    Leave a Comment
    Make Up Tips To Reduce Dark Circles  Cosmetics, are girl's best friend. While you're waiting for your under eye dark circles to fade, hide them with foundation or concealer. Here is the perfect choice of concealers, the right step procedures and other eye make up products to help you own a flawless skin. Read to master the art of under eye make up.

    Causes

    Dark under eye circles are extremely common. Causes of under eye circles and under eye discoloration are, lack of sleep, smoking, poor circulation and stress

    Concealers
    Concealers are created with a denser composition and perfectly designed for their intended use. They are designed for small area coverage and are not the makeup product for full face application Foundation alone cannot be enough to cover your dark under eye circles as it is transparent. A quality concealer with a dry texture last the longest as the cream base can adhere to your skin. A liquid concealer tends to melt if the temperatures rise. Under Eye Concealers are available in formulas and consistencies that range from stick, cream, airbrush, pencil, and waterproof. Application tools vary with concealers applied by sponge or brush.

    Color Choices
    Trying to hide the circles under a light shade of concealer will create a white mask. That will not reduce the shadows but emphasize the dark area, instead of concealing them. Your skin tone will be your guide as to which shade of concealer will best suit you. It is safe to go one half to one shade lighter than your under eye circles. A golden toned concealer such as will counteract the blue-purple tones and look the most natural for you. Dark circle you can go with dropping down one full shade lighter but you will have to be much more cautious with blending when you apply .

    Application
    To hide dark under eye circles, select a cosmetic under-eye concealer that's one shade lighter than the foundation you're using. Understand that a pale yellowish concealer helps hide blue or grayish circles, while a light blue or mauvish concealer masks brownish under-the-eye bags.

    Begin with a freshly washed and exfoliated face. Dab concealer under your eyes gently, using a soft circular motion. Apply foundation up to the concealer and blend the two shades together gently, using a circular motion to cover dark under eye circles. Finish with a dusting of untinted face powder for a polished, seamless look.

    Avoid

    * Avoid concealers containing oils, because the oil will settle into the fine lines under your eyes and draw attention to the circles.
    * When using a cosmetic under eye concealer, wearing foundation is a must to avoid the "white mask" look.
    * Never use an over-the-counter facial and body cream bleach under the eyes to eliminate dark circles. Use only prescription creams administered under a doctor's supervision.
    * Always apply concealer gently--rubbing can cause swelling, redness or bruising of the under eye area.
    Read More...

    Make Up Tips For Teens

    Leave a Comment
    Make Up Tips For Teens“As a teenager the box of colorful makeup products, the soft brushes attracted me to flaunt them on my soft skin as and when I saw my mother using it. But as soon as my mom saw me reaching near the box she would scream and hide the box in a place where I could never even get a glimpse for the rest of the year. Now when I have crossed my teenage life, I have the access to the flamboyant colors. How I love using it everyday to the college” recalls, Prakrathi.

    Mothers have always posed restrictions on the teenage daughters to avoid using any makeup on their soft and subtle skin, fearing the reddish blemishes or over aged look on their little angels' flawless skin. However, now they can breathe easy for even teens can use cosmetics without any side effects with the right make up tips and products. Follow these tips to enhance your natural beauty and best features.

    Foundation and concealers :

    1. Although foundation helps to clog pores experts suggest to avoid the use of foundation as it looks overdone, instead use dot concealers to cover up any blemishes. To set the concealer lightly dust on some loose powder over your entire face to even out your skin tone.
    2. To cover the blemishes, dark circles, acne scars or any skin imperfections use a concealer pencil, according to the skin tone.

    Eye Makeup

    1. Curl your eyelashes, before applying any eye make up.
    2. To really make your eyes pop with drama and color, you will need eye shadow, eye liner, mascara and brow liner. When you begin using mascara, brown works best for both blondes and brunettes.
    3. Use a white eyeliner pencil on the inside rim of your lower lashes, to brighten the eyes
    4. To enhance the shape of the brows, use a toothbrush to brush brows in place.
    5. Fill in the gaps of the eyebrows with the help of soft gray eye pencil.
    6. Apply some concealer around the eyes and smudge it well for fine finish.
    7. Avoid using sparkles and metallic for eye makeup.

    Lips :

    1. Use lip moisturizer containing softness of beeswax and tea tree oil with the antiseptic qualities.
    2. Apply lip gloss for luscious lips. To add colour to your lips for a late night party try a lipstick in a sheer color.
    3. Always outline your lips with a pencil liner as it will help in keeping lipstick or gloss in place. For a longer lasting effect, apply oil-free foundation to your lips and using a lip crayon.
    4. Avoid using lip balm too often as your lips will become dependent on it and will stop moisturizing themselves.

    Cheeks :

    1. To blend the blush better, apply blush by first sweeping your brush through the loose powder then through your powdered blush.
    2. Say no, to all the water based products as most contain oil that keeps the product glued on the skin for days. Instead opt for oil-free products that contains ingredients like salicyclic acid or tea tree oil. These products also aid in acne treatment.
    3. Pinks and peaches compliment almost any skin tone. Apply to the apple of your cheeks and blend outwards, towards your hairline. For the face makeup, use only the good brushes. Check make up brushes for flawless make up application.

    Other Make up Tips


    1. Never forget to remove make up with the help of cleansing milk.
    2. Use a non-alcoholic toner or cold water on face.
    3. If you have oily skin, blot away the excess oil by laying either a tissue or one of the face-blotting papers. You can also use perm end papers too. Do this before you do anything else.

    Always remember clear and healthy skin is the perfect canvas for makeup. So pamper your skin with the right beauty tips for the head turning looks.
    Read More...

    Make Up For The Indian Celebrity Beauties!

    Leave a Comment
    "It is not her natural beauty. They must have donned too much make up to look good!" This is a statement that we often use as someone praise the beauty of a celebrity damsel. Let us discuss some make up tips that helps the much-appreciated Indian beauties Aishwarya Rai, Sania Mirza and Arundathi Roy to dazzle around the world.

    The perfect Indian beauty

    Can you guess the name of a lady who was praised for her beauty ever since her appearance on the public till date? Yes, it is none other than Aishwarya Rai (aka Aishwarya Bachchan) with her defined features and accurate styles. Here are the most popular make up styles of Aishwarya Rai.

    Aishwarya's recent appearance sees her in ironed out hair in slight waves, which is parted at the beginning of the face from the right side to the left. Her eyebrows are drawn into perfect and long arches. She chooses the medium coloured glossy lipsticks with a mat effect. Her sea green eyes are drawn elaborately at the upper lid, while the lower part of the eyes is slightly touched with mascara. Apart from the foundation, toner and concealer; Aishwarya avoids other facial make up creams during informal visits.

    The sporty beauty

    There came a girl in Indian sports who changed the common Indian myths that women in sports field are devoid of beauty. She is appraised for her glamorous appearance as well as her powerful strikes. Yes, she is none other than Sania Mirza, much acclaimed as today's youth icon.

    Sania Mirza's beautiful appearance is well acclaimed for the careful and at the same time natural make up. This damsel usually appears with her hair let loose with a careless partition in the middle. Her eyebrows are unattended occasionally and she avoids the application of eyeliners. However matching foundation and concealers brightens her face up. She highlights her eyelashes with mascara and her lips are made sensuous with the careful application of lip conditioners and mild coloured lipsticks. She is upto the standards of fashion trends and her fashion accessories often get changed in accordance with the pulse of the time.

    The classic beauty

    When the Booker Prize for literature was announced in 1997 was announced, the Indian youngsters got a new persona to follow up in social life as well as style. The beauty of Arundathi Roy is the one any genius in India craves for. With her simple touch ups Arundathi Roy keeps her style alive at all times.

    The curly hair (Be it long or in boy cut) of Arundathi Roy is never seen bound at any occasions. She never uses any foundation creams or basic coats in facial make up and her skin shows the natural oily glow. Her eyebrows are carefully trimmed and her eyes are beautified with natural kajal. A nose ring sparkles her nose and she always prefers to have a touch of lipsticks on her lips. Her accessories and attires get changed not according to the trend but with her tastes.

    Each of these beauties has their own make up secrets. Which is your style? If you want share it, we welcome you to write to us!
    Read More...

    Make up for Dark Complexion

    Leave a Comment
    Compared to fair skin, dark-colored skin is more resilient because of having more pigments. Dark skin can even withstand the exposure to the sunlight and even appear to be even much hardier. During the early years, men tend to discriminate their fellowmen who have dark skin. But now in the recent years, people who have dark skin have prove their worth to the world. And that possessing dark skin can also be flawless, healthy and clear and can look beautiful as well. Wearing makeup for dark skin have also become possible in the recent years.
    Suitable Color Makeup for dark skin

    For color foundation, it is essential to use a liquid or creamy one that is not oily instead a water-based one. If you have a dark skin with so many yellow pigments, please use the foundation product that is not an orange-based. A good concealer and a sheer foundation can help your skin to look or appear perfectly with illusion. However the foundation or the concealer should not be lighter than the tone of your skin. Please try to use the one that is close enough to your normal skin color. Compared to fair or lighter skins, makeup for dark skin should be lighter as dark skins have the tendency of showing up the layers of makeup when applied. It is important to focus on the blending of makeup for dark skin. One tip is adding a water drop on the foundation before applying on the dark skin can also help. In doing this, do the mixing on the back of your hand before the application. The effect can be seen during the daylight.

    Using a light-colored powder after the application of foundation is also possible. This technique will give your skin a sheen that is not too heavy. Do not apply powder too much on your skin especially on the area of the eyes. Excess powder should always be dust off.
    Color Blusher for Dark Skin

    Color blusher is also part of doing makeup for dark skin but with applicable colors of course that will match your skin tone. The advisable color blushers makeup for dry skin is deep orange, rose and coral. Do not wear blushers that are colored with peach or brown shades if you have dark skin as these will not match your skin tone. However, if you have a very dark skin tone, you can use the color of rose pink for your blush-ons during the daytime and the colors of wine, plum and bronze during night time. In putting on blusher makeup for dry skin, blending over the cheekbones should be given enough attention to avoid overdoing. Make sure that the blending is perfect enough to brighten the skin tone of the dark skin. The color of gold is also perfect during night time as makeup for dark skin.
    Read More...

    How to Apply Eyeshadow, eyeliner, pencils

    Leave a Comment
    Making the eyes come alive is a real art and like any good artist you will have to first leam the exacting techniques of accurate Brush work and careful .colour-blending. Almond shaped eyes are considered to be the ideal. So when making-up eyes, one tries with the help of light and dark eye make-up to inake the necessary changes to give the eyes an almond appearance.

    Eye is a part of your body and beauty. Make-up can adorns your beauty only if it is applied very carefully. Your Eyes are the window to your soul. Eye makeup is a complex set of steps. Select a foundation that is conformable to your skin tone and dab some spots around the center of your face. Put your foundation first over your whole face before you start on your eye makeup. Mix the foundation using a make-up sponge or your fingertips till it covers your entire face.

    Be particularly careful about mixing your foundation at the edges so that it does not look like a mask. Apply an eyeshadow primer from lash to brow to make your eye makeup remains last. You can skip this step if you prefer. For your eyes, select the eye shadows in compatible shades. Actuate the lightest shade just below your brow bone, and the medium shade over the rest of your eyelid. Apply the dark eyeshadow into the crease of your eyelid to deepen your eyes. Combine the two where they meet with your fingers to give a more natural look.

    Apply the light shadow from lash to press at the center of your eyelid. Putting on liquid eyeliner does take some exercise, so have a bottle of makeup remover to hand until you are confident in the technique. There are two sections of eyeliner, wet and dry. Wet eyeliners attend to give a darker, more dramatic look. Dry eyeliners are milder and better for creating a smoky look. If you purchased eyeliner which is a pencil or stick, draw around the rim of the eyes in a straight line.

    Not to use a lip liner if you wish for your face to look slimmer and if you must use one, line your lips after putting lipstick as then you won’t be left with a grisly looking lip outline when the lipstick wears off. Avoid using lip liner which is too dark. Use a brush to fill in your lips with the desired color. Don't draw the pencil across your eyelid as this could result in elongation of the skin. Inspite, apply the color to the palm of your hand, pick up some of the color with your pinky and apply softly to eyelid.

    Eye Pencils

    Whether they are being used to shade or define the eyes, lips or brows, pencils should glide on smoothly, without dragging the skin, If they seem to be too soft and crumbly, place them in the freezer for a few minutes to harden before applying, Ifthey are too hard and pull at the skin, soften the point first by gently running it over the back of the hand.

    An eye pencil is used in the crease of the lid or as an eye liner. Eye pencils come in many colors, and the newest are creamy enough to spread like cream eye shadow. Used with shadow, pencils can effectively compliment your eyes.

    An eyebrow penciI is harder and is made to be used on the eyebrows.

    Eyebrow Pencils

    These can be used to fill sparse brows and enhance the overall shape, Take a sharpened pencil in the shade closest to the natural colour of your eyebrows and fill any open spaces using short irregular strokes to simulate real hair, When defining the brows, avoid drawing on one strong line as this will look false, Work over the brows in small feathered strokes, If the definition is too strong, soften it by dusting with translucent powder or roll a cotton bud over the brows.

    Applying Eyeshadow

    Eye shadow, in striking, slightly shimmering tones, applied with a light hand, can give the face an air of lumrnosity. EYESHADOW should always glide on smoothly, and can be used to subtly change or enhance the shape of the eyes, to add simple definition or to make a strong impact, depending on your choice of colour. It is also useful to disguise the blueness many of us have on the skin on our eyelids.
    More on Eye Shadow

    Eyeliner Application

    EYELINER Application requires a steady hand, Ifyou find it difficult to apply liner with precision, try drawing it on using small feathered stokes and then blend with a fine-tipped brush or the point of a cotton bud , To make things easier, put a mirror on a flat surface and then work looking down into it.
    More on Eye Liner

    Eyeliner is gettable in a wide range of hues, from the common black, brown and grey to more adventurous shades such as bright primary colors, pastels, frosty silvers and gold. Using lipstick with moisturizers and sun protection is one efficient way to ward the lips from weather changes. Lipstick adds the finishing touch to any makeup application. For longer-lasting lip color, shade both lips with lip liner after outlining them.

    Face powder is among the few beauty essentials. Mineral face powders are chemical and fragrance-free and hypoallergenic. Powder gets stick on eyebrows and eye-lashes, if not cleaned with an eyebrow brush. A powder must always be applied after the foundation and earlier the eye makeup. Opt for an oil-free powder if you have oily skin. Avoid applying large amounts of powder under the eyes. Always remove the excess powder with a clean brush. Apply cream blusher in light downward direction to prevent it from creasing in specks of color from catching in the fine hairs on your face.

    Eyebrows

    Factors to be considered before shaping your brows:

    The facial distance from hairline to chin.
    The distance between both the eyes.
    The hair color and color of eyebrows.
    The facial distance from hairline to chin.
    The width of the forehead from temple to temple.
    The thickness of the brows

    Small eyes: Don't use too much shadow or liner - it will make you eyes look smaller. Apply a light color on eyelid, use a darker color in the crease and use a highlighter under the brow.

    Large eyes: Wear darker shadow on the lid and extend it to the crease. Use a flat color under the brow to highlight.

    Deep-set eyes: Use light colors on the eyelid and under the brow. Use a medium color in the crease. Emphasize the outer corners with shadow.

    Wide-set eyes: Use darker colors on the inner corners of the eye.

    Hooded eyes: Apply light colors on the lid. Use darker colors from the center of the eyelid to the outer corners and blend.

    Round eyes: Make round eyes longer by using color all around and extending toward the outer corners.

    Asian eyes: Apply highlighter under the brow. Use light shadow on the inner half of the lid and a darker color on the outer half.

    How to apply eye mascara


    With modern mascaras there is no need to pump the wand in and out of its container before applying, This can actually cause overload and result in clogged lashes, You need only enough product on the wand to coat the lashes, so any excess should be wiped off with a tissue, Roll the wand through the lashes to help curl-definition, Always work on the upper lashes from underneath to avoid overloading and keep mascara on the lower lashes to a minimum, especially if you are looking tired or have a tendency to rub your eyes a lot.
    Read More...

    Tuesday, July 8, 2008

    How to Apply Nail Polish

    Leave a Comment
    Steps for how to apply nail polish
    1. Remove the old nail polish, if there is any.
    2. Then clean your hands thoroughly.
    3. Apply some cream on your hands but not on your nails.
    4. Make sure that you apply a single coat of Top and Base Coat first.
    5. Then you should stroke the nail polish through the center of the nail from base to tip.

    6. Then stroke the polish around the base of your nails without touching the skin and down one side of the nail.
    7. Then you should stroke the polish down the other side of nail.
    8. You should wipe across the tip of polished nail with thumb or a tissue. Doing so helps you prevent chipping of nail enamel.
    9. You should apply second coat of nail polish only when first coat of enamel is dry.

    Then apply the enamel quickly with long light strokes.
    Read More...

    Natural Hair Care tips

    Leave a Comment
    Natural Hair Care tips
    Some important hair care tips

    * Do not a cap while exercising.
    * Never comb wet hair.
    * Use a brush with natural bristles.
    * Use a hat or an umbrella when out in sun to protect from UV Rays.
    * Use a good hair conditioner, hair pack and apply oil on the scalp and massage properly if you have colored your hair.
    * Massage gently on the scalp using oil and leave for 2-3 hours before washing your hair.
    * Use coconut oil in summers.
    * Massage with hot mustard or olive oil.
    * Natural conditioner like eggs, alma, water, henna and beer adds to the luster of your hair.
    * Always use a branded and quality shampoo.
    * Use curd to prevent hair fall.
    * Avoid using artificial products like gels, etc.
    * Seek advice of hairstylist before getting any hairstyle.
    * Get your hair trimmed in regular time intervals.
    * Apply mousse or any other volume-enhancing product to your hair while it is damp and secure it in a loose bun on top of your head. Loosen your hair when dry, you'll find fabulous volume added to the roots of your hair.
    * Lighten your hair color with lemon juice if you don't have enough time to go to the parlor. Apply conditioner to damp hair and again apply lemon juice directly on the front, as the streaks at front are light. Now rub extra juice at the ends of your hair and sit in the sun for 1/2 hour and then wash using moisturizing shampoo.
    Read More...

    Latest Modern Haircuts For Girls

    Leave a Comment
    Hair can be termed as the crowning glory of girls. In effect, people apply different haircuts to make themselves look distinct as well as attractive. Whether your hair is short, long or medium in length, you can acquire a completely new look by donning a suitable hairstyle. In the modern day world, it has become extremely important to look presentable. For this, haircut styles are equally important and need to be taken care of. Given below are some modern haircuts, which will help women in styling their hair and bringing out the best in their personality.

    Short Modern Hairstyles

    For a short modern hairstyle, there are a number of options to be explored. You can choose a 1920s bob, garnished with long sleek bangs. It especially looks good on those who have straight hair. In case you have thick hair, go for blunt cut. For fine hair, a layered bob cut will do wonders to add volume to your hair. Moreover, it is one of the best cuts to give yourself a glamorous look, whenever you need one.

    Medium Modern Hairstyles

    Medium hair is the most perfect in terms of style and maintenance. You can treat them any way you want and still be careless. For medium hair, you can try paneling, which involves applying twisting layers in your hair. This adds volume as well as style to your hair. This hair cut looks lovely with those having round eyes. Shag hairstyle is the most preferred hair style for medium hair. In this haircut, layers are cut to give a frame to your face. Leave some hair in front of your eyes, to give a sense of mystery and attraction.

    Long Modern Hairstyles

    Long hair has its own innate charm and nothing can surpass it. You can style long hair in a number of ways. You can add layers to your hair to make them look enigmatic. Streaking the layers will spruce up your haircut like never before. For a cute look, go for bangs in front, which is quite in vogue. It gives a naughty look to your haircut. Long shag can also be preferred by those who have long hair. It gives you a tamed and refined look, making the hair extremely manageable.
    Read More...

    Applying Mascara

    Leave a Comment
    Mascara gives a finishing touch to your eye makeup and must cover the lashes from roots to the tips. Deposit the color on the mascara wand by twirling it in the pack and then cover the upper lashes from their base to the tips in full strokes to make the lashes look thicker, longer, well defined and separated. Mascara is applied from the underside by holding the wand horizontally parallel to the eyelid and the brush is rolled slowly in the upward stroke. For lower lashes, one has to be more careful so as not to smudge the under eye area and the wand is to be held vertically and mascara is applied from side to side. Less mascara is used on the lower lashes and extra color should be blotted off using the tissue paper. Usually women opt for more than one coat of the mascara, which combs the lashes too so that they do not look stuck together.

    If mascara is deposited on the wand more than needed, tissue the extra color off before applying it. Different colors of mascara such as brown, navy and green can make you look funky instantly. It is important that mascara is used on an individual only to avoid transferring eye infections and if it causes even the slightest irritation in the eye, it must be immediately discarded. Wiggle the brush a little at the roots of the lashes as it allows the bristles to move between the eyelashes, combing them and separating them. Let mascara dry between any of the two coats and comb the eyelashes to separate the wet lashes. Do not rub eyes to remove the mascara but use the eye makeup solvent instead. Before applying mascara, use an eyelash comb or damp toothbrush to comb your lashes. Always use a clean and fresh mascara wand on damp lashes.

    Black mascara can be used by anybody at anytime though blondes should only use it for bright night makeup. Thin and short brush is best as it is easier to control and gets to the corner of the eye easily. It is also advisable to powder the under-eye area before applying mascara to avoid smudging. Curl the lashes before applying mascara by moving the wand in a zigzag fashion to make the lashes look wider and brighter. Applying mascara only on the upper lashes lend them a dramatic touch, while applying it lightly on the upper and lower lashes, make the eyes seem wider. A gel-based mascara enhances the lashes while thickening mascara looks more dramatic and adds volume to your lashes. Brown, navy and aubergine shades add subtle and sophisticated touch to your eyes while redheads can use burgundy shades. Women with strawberry-blonde hair may try different shades of brown. Be sure not to match your mascara color with your eye color.
    Read More...

    Party Make Up Tips

    Leave a Comment
    Party Make Up Tips

    We all wear makeup everyday, but when you are invited to a party the make up has to be special. Your make up should be such that it should make you stand out in the party. Here are a few tips on party make up that will make you the center of attraction in the party.

    * Before the night of the party decide what you are going to wear and try it on. Do a dress rehearsal with the accessories that you are going to wear.
    * Choose lipstick according to the color of your skin. Pick something that will suit you nicely.
    * Highlight either your eyes or your lips. If you are wearing red lipstick then do not highlight your eyes.
    * Choose a nice perfume and do not eat garlic, as it will affect the scent of your fragrance.
    * Soak in the bath for a while and relax before you leave for the party. This will make you relaxed and you will have more fun at the party.
    * Choose an elegant and easy hairstyle.
    * If you are not comfortable in a dress you do not have to wear one, you can wear trousers and you can accessorize them for the occasion.
    * Don't wear too many accessories. Less is better for a party.
    * Apply fresh nail polish before the party to ensure that your nails are looking gorgeous.
    * Last but not the least be on your best behavior at the party.
    Read More...

    How to get rid of pimples

    1 comment
    How to get rid of pimples
    How to get rid of pimples fast?

    1) What Is A Pimple?

    A pimple is a result of a blockage of the skin's pore. It is a skin disorder that ranges in seriousness from mild to severe and affects nearly majority of teenagers to young adults in their early twenties.

    It is important to understand why it is necessary to get rid of pimples.

    2) Why We Must Get Rid Of Pimples?

    Apart from being just a physical condition, pimples can have adverse emotional effect and can severely affect one's self-esteem and self-confidence. That alone is enough reason for one to get rid of pimples.

    3) What are the causes of pimples?


    Pimples are caused by the blockage of follicle ducts of sebum glands. However, this may be caused by many indirect factors such as stress and environment.

    4) What are the common ways of getting rid of pimples?

    - Drink lots of water throughout the day to flush the toxins out of your body which might help to lighten your condition

    - Cleanse your skin 3-5 times daily with a specialized acne cleanser or an unscented soap.

    - Exercise regularly to reduce your stress level which will indirectly help to improve your skin condition

    - Lime juice mixed with groundnut oil may be good treatment for acne and pimples

    5) How To Get Rid Of Pimples Fast?

    - Apply a bit of toothpaste on the affected area before bed to reduce irritation and redness.

    - Mix three table spoons of pure honey and one teaspoon of cinnamon powder. Apply it on the pimples and leave it there overnight. Wash it the following morning with warm water. Continue this for several weeks to achieve results.
    Read More...

    How to Apply Body Makeup

    Leave a Comment
    How to Apply Body Makeup Body makeup is great for hiding any number of unsightly marks or skin issues you may have, especially for the legs since the sun is starting to bring out the shorts and skirts. Body makeup can cover scars, slight stretch marks, nicks, freckles, bruises and even spider veins. But the key is to apply it correctly so that your look appears flawless.


    Just as you want your foundation shade to match your natural skin tone, the body makeup you use should match the rest of your body. A good rule of thumb to remember is that the shade of body makeup used on your legs should be the same shade as your arms. Your legs should never be darker you’re your arms. Applying body makeup to your chest or back? Then you need to make sure your shade also matches your neck. This may seem overwhelming now but as you practice more you’ll be a pro.


    When it comes to applying body makeup, it isn’t as simple as just spreading it on like lotion. As with applying foundation to your face, there is a method of application for applying body makeup in order to get the best results. While shopping for your body makeup shade, be sure to have the guidance of a makeup consultant who can help you find the right shade. Be sure to put some of the body makeup on your legs or whatever area you are trying to conceal and check its appearance under natural daylight to see if it looks natural. What’s the point of using body makeup to conceal your skin issues if it’s going to be obvious? Once you’ve found the ideal shade, be sure to also purchase the powder that goes with it. Many people only use the body makeup but this makes it easier for the makeup to smudge or come off on your clothing. The powder is specifically formulated to work with the body makeup in order to set it and keep it in place.


    Use a latex sponge to apply your body makeup to the desired area(s). Blend into your skin until the color begins to disappear into your natural skin tone. Next, take your powder and pat it over the area with a powder puff until the look is complete. Use a wide and fluffy powder brush to remove excess powder from the area. Check yourself out in the mirror to make sure that you’ve got even coverage.


    If you’re trying to conceal spider veins or age spots, you’ll want to choose a body makeup shade that is cream-based and opaque for the best coverage.
    Read More...

    Face Packs for Dry Skin

    Leave a Comment
    Dry skin has no permanent cure but the skin can be softened and made smoother by using a few remedies. Dry skin has a low level of sebum and can be prone to sensitivity. The skin has a parched look caused by its inability to retain moisture. It usually feels "tight" and uncomfortable after washing unless some type of moisturizer or skin cream is applied.

    Chapping and cracking are signs of extremely dry, dehydrated skin. A face pack made of fruits rich in vitamins and water can have a good effect on the dry skin. Some of the fruits that can be used are papaya, peach, and banana. Mashed avocado can also be applied to the skin for a glowing effect. A mild lotion or moisturizer can follow these face packs, to retain the moisture produced by the face pack. Night creams containing alpha hydroxy acids can be used as night cream so as to have a fresh looking skin in the mornings.

    A diet consisting of a lot of Vitamin A, Vitamin B, and Vitamin E can be taken for an inner glow in the skin. Leafy vegetables help the most in replenishing the moisture in the skin. The water intake needs to increase a lot to help the body have the required amount of fluids.

    Rose water, almond oil, honey, olive oil, and beaten curd can all be used as good face packs. Other than this, daily massage or facial sauna with herbal oils and use of mild detergent and fragrance free soap can work wonders on dry skin.

    Dry skin is also known as xerosis. Dry skin looks dull, especially on the cheeks and around the eyes. Dry skin is characterised by itching, flakiness, scaling, roughness and having tight feeling. Breakouts may be seen in the dry skin.

    Dry skin is most common in your lower legs, arms, flanks (sides of the abdomen), and thighs. Dry skin is usually not serious, but it can be uncomfortable and unsightly, turning plump cells into shriveled ones. The most serious dry skin condition, is the inherited group of disorders called ichthyosis. There may be tiny expression lines on the dry skin area.

    Face Packs for dry skin

    A facemask of egg white and honey gently removes the tan from your face.

    For oily skin, apply a mixture of grapes, lemon and egg white. Leave it for 20 minutes and rinse with warm water. While lemon acts as a natural cleanser, grapes will soften your skin and egg whites will tighten it. Don't be alarmed if your skin tingles.

    Apply the mixture of honey and milk on the face . This will make your skin glow.

    Protect your skin from the sun. Winter sun can be as dangerous as summer sun. Use a sunscreen of SPF 15 or greater.

    Mix half-a-cup honey to your bath water for soft and smooth skin.

    Avoid caffeine, smoking, and alcohol. They act as diuretics and are guaranteed to suck you dry.

    Use almonds and rose water for your face. Make a paste and leave it on your face for 15 minutes and watch your skin glow.

    Dry skin face pack

    * 10 almonds.
    * Two teaspoons of oatmeal.
    * Four tablespoons of full cream milk.
    * Two teaspoons of china clay.
    * Juice of half lemon.
    * One mashed avocado.

    Make a pack with a mixture of 10 almonds, two spoons oatmeal, four tablespoons of full cream milk, two spoons china clay, juice of half a lemon, and one mashed avocado. Apply on face and leave it for 20 minutes. Dampen cotton wool with cold milk and wipe it off. Splash your face with cold water and apply a light moisturizer.
    Read More...

    Sunday, July 6, 2008

    Make Up Your Eyes in 8 Steps

    Leave a Comment


    Here's How:

    1. Prep your eyes with concealer Concealer can be used to cover up undereye circles or just the bluish discoloration just under your inner eye. To cover dark undereye circles, apply three dots of concealer under each eye. Start at the inner corner where skin tends to be darkest, then under the pupil and the third on the outer edge. Pat, never rub with your ring finger (this finger tends to have the softest pad) until it disappears.

    2. Apply eye base to your lid Eye base is the secret to keeping your shadow in place for hours. Without properly priming your lid first, your eyeshadow will likely end up a greasy line in your crease.

    3. Apply shadow. It's great to use a three-toned shadow and build from lids to brow. Allowing them to blend into each other like a rainbow is gorgeous, according to celebrity makeup artist Mally Roncal. Start with a light color that almost matches your lid. Sweep the color across the lid and up to your browbone. Follow with a medium color across your lid only. Build on this with a darker color in the crease. Blend the colors well.

    4. Follow with eyeliner Dark eyeshadows work great as eyeliners. Wet a slanted brush, then dip in a dark eyeshadow. Line eyes as close to the upper lashes as possible from the inner corner to the outer corner. Follow with liner on bottom eyes, but only line from the middle of the eye out. Smudge the bottom line with a Q-tip or your finger. You don't want a prominent line. For a smokey eye, use a brush to pat in a dark eyeshadow along the upper lid and below the lid. You don't want a stark line, instead you want to blend it so it's 'smudge-y.'

    5. Brighten your eyes with a highlighter This step involves only the inside part of the eye. With a gold or pink highlighter (white is too bright), draw a v-shaped shape that follows the inner corner of your eye from top to bottom. Blend with your fingers. This will help make eyes 'pop.'

    6. Highlight your brow Take the same highlighter and dab it on your browbone, concentrating on your mid-brow outward. Blend with your finger.

    7. Curl lashes An eyelash curler will make even long lashes look more gorgeous. For added effect, you can heat the curler under a blowdryer for a couple seconds. Test curler before applying to lashes because you could burn yourself.

    8. Apply mascara Place the wand of your mascara brush at the bottom of lashes and wiggle back and forth. Follow with another few sweeps of the wand. Apply to bottom lashes as well.
    Read More...

    Best Make-up for Your Skin Tone

    Leave a Comment
    Best Make-up for Your Skin Tone


    Depending on your skin tone, the make-up you choose will need to flatter your face and hair. If you apply the wrong colors, you're not doing yourself a favor -- and you can look all washed out, or overdone. Play up your features with the best make-up colors, tints and hues for your skin tone.

    Make-up for Fair Skin
    If you're fair-skinned, sheer colors look best on you. Apply light earth tones and soft pastels, such as blue and lavender to accent your eyes.

    Various shades of pink will look good on your eyes, cheeks and lips. Keep your mascara to brown or brown/black. Light, sheer lipstick adds a finishing touch. Peach is always a good choice for our fair-skinned friends, it looks natural and compliments blonde hair.

    Medium Toned Skin
    Your warmer completion gives you many options for a fabulous makeover. Being "in-between" does have it's benefits. Deep matte earth tones and jewel colors such as hunter green, dark grey, beige and brown will accent your eyes. Coral and plumb colors work good to accentuate your cheekbones.

    Experiment with your lip color. Your skin tone is very versatile and if you're brunette, anything from pink to red will look great on you. Top it off with lip gloss for extra staying power. Bronzing powder dusted over your forehead, nose and cheeks will give you the ultimate sun-kissed look.

    Make-up for Dark Skin
    You may need a heavier hand when applying make-up to dark skin -- but you need to choose the right shades. For eye shadow, gray, brown and natural shades will compliment your eyes. Also try shimmer colors such as silver, bronze, and terra-cotta. Experiment with mascara colors such as navy and dark purple.

    For blush, more pigment for darker skin is a must. Deep rose and apricot shades highlight your cheekbones beautifully. Sometimes a bronze highlighter does the trick. Stay away from anything with a strong orange base as this will not flatter your skin.

    Dark lip color such as apricot, blackberry, caramel and red will compliment your lips.

    Olive and Ethnic Skin Tones
    With your darker skin tone, neutral shades as well as dark purple and blue will look great on your eyes. Metallic colors also look remarkable, as long as the shades remain darker.

    Highlight your cheekbones with bronzing powder, dark plum, chestnut, or terra-cotta blush. Keep the tones natural and avoid anything too light.

    Lipstick shades that will bring out your lips are berry, plum, russet, or almond. Avoid "true" reds, they will clash with your skin tone.
    Read More...

    Natural method for straightening hair

    Leave a Comment
    Natural method for straightening hair

    Did you know that there is a natural method for straightening hair too? Of course, it may not be instant, but then it is infinitely healthier than straightening chemicals and irons that do irreparable damage to hair. Get a fresh coconut and blend it well, till about a glassful of milk can be extracted from the pulp. Add the juice of one lime to this milk, stir well into the glass and refrigerate till it acquires a creamy layer on the top. This cream can be rubbed onto the scalp, and left on, covered with a hot towel, for about an hour. Then rinse it off with a mild shampoo and warm water. Repeat this three times a week and you will notice that your unruly locks are gradually straightening up.
    Read More...

    Home Made Natural Face Packs

    Leave a Comment
    Home Made Natural Face Packs


    Our face is very dear to all of us and it does not pinch us a little to spend fortune to preserve it beautiful. It is not easy simple to stay pretty and fresh. it needs a lot of hard work. Remember no gain without pain. To protect your face from day to day harsh damages we really do not have to spend whole day in front of our mirror instead we just have to be regular. It is also required that you do not use any face cream, lotion or gel which have heavy chemicals in it.

    So following are some of the recipes to make home made masks, face packs and scrubs for daily use

    For Glowing Skin

    What do you need: A ripped banana, sandalwood powder and honey
    Method: Mix sandalwood powder with mashed banana and honey into a thick paste.

    What does it do: It works as a deep cleanser and gives natural glow to dull dry skin.

    For Wrinkled Skin

    What do you need: almonds and milk
    Method: Soak almonds in milk overnight. Grind almonds in the same milk after taking off it's brown skin. Grind it into paste do not make the paste runny by adding to much of milk.

    What does it do: Almonds are rich in Vitamin A which moisturizes the skin and milk improves the complexion and cleanses it naturally.

    For Blemishes

    What do you need: Honey

    Method: Apply natural honey on your face and massage it gentle all over your face for 10 minutes and wash your face with cold water.

    What does it do: Honey can be used instead of alpha hydroxy masks because if its high content of the acid. It is also safe for sensitive skin.

    As a gentle face scrub

    What do you need: Walnuts, rose water and milk

    Method: Make a paste with walnuts, milk and rose water. The paste would not get to thin, it would be granular.

    What does it do: It would remove dead skin and appears new fresh skin.

    For enlarged pores

    What do you need: lemon juice and orange juice

    Method: Mix the juices and apply on all over face giving upward and outward stokes. Wash it after 10 minutes.

    What does it do: It is good facial mask for oily skin. It helps improving the large pores condition.

    For Under eye dark circles

    What do you need:Cucumber juice or tea bags or mint leaves

    Method: Apply cotton pads soaked in cucumber juice or tea bags soaked in iced water on your eyes. Crushed mint leaves also helps for under-eye circles or to relieve stress.
    What does it do: It has cooling effect and is very relaxing.

    For aging skin

    What do you need: white of an egg and honey

    Method: Beat white of an egg with honey and apply on face. Avoid getting to close to eyes.
    What does it do: It keeps skin soft and moisturized, prevents wrinkles.

    For large pores

    What do you need: Plain water Ice

    Method: Massage your face with ice for 10 minutes.

    What does it do: It tightens the pores and make the appearance of the pores less visible
    Read More...