Showing posts with label Eye Care. Show all posts

Friday, May 28, 2010

7 Ways to Remove Undereye Circles

4 comments
7 Ways to Remove Undereye CirclesIt is frustrating to look in the mirror and see dark circles around your eyes. The reason that this is so frustrating is because you can do a lot of things to improve the appearance of your face but few of them are going to matter if people can still see those dark circles. This annoying health problem causes you to look older than your actual age and makes people constantly ask you if you are tired.

If you're sick of answering that question and you're ready to start looking your best, here are some of the things that you'll want to do to get rid of those dark circles:


* 1. Get enough sleep.
The most common cause of those dark circles really is that you're not getting enough sleep. If you're serious about improving your appearance then you'll need to make changes to your schedule that will allow you to get enough sleep every single night. Try it for just a week or two and you'll see that the circles go away and you're looking and feeling your best.

* 2. Drink lots of water.
Many people find that drinking at least eight glasses of water per day can significantly improve the appearance of the skin on the face. This includes a reduction in the appearance of dark circles.

* 3. Cold liquid compresses on the eyes.
Getting enough sleep and drinking enough water are great for long-term results but what about those times when you have dark circles that you need to get rid of immediately? Cold eye compresses can help. Dip a cotton ball in milk or tea and press it on the eyes for a few moments. Alternatively, cold cucumber slices on the eyes may help.

* 4. Make-up. There's nothing wrong with covering up those dark circles with concealer if all that you're seeking to do is hide them for a short period of time. Find good make-up that won't make it obvious that you're trying to cover something up.

* 5. Eye creams.
In addition to the make-up that may be used to cover up dark circles temporarily, you can benefit from using nighttime eye creams that are designed to reduce the puffiness and dark circles that you see upon wakening up. Mostly these creams are intended to moisturize and nourish the eyes while you sleep so that the circles don't form.

* 6. Eat foods rich in iron.
Studies in the past have shown that having enough iron in your diet can significantly reduce the appearance of undereye circles over time. In general, it's important that you eat a balanced and nutritional diet if you want your skin - including under your eyes - to look as good as it should.

* 7. Cosmetic or plastic surgery. There are several different cosmetic procedures that can be used to reduce undereye circles that aren't going away even when other methods have been tried and tested. These include non-invasive procedures such as the use of lasers to reduce the spots under the eyes. They also include more invasive eye lift procedures
Read More...

Wednesday, August 26, 2009

How to Get Perfect Eyebrows

Leave a Comment
How to Get Perfect EyebrowsWhat is the most important feature of your face? It is none other than the eyebrows. This small part of your face actually balances the entire look of the face. They bring the focus to our eyes and they need to be taken care of properly.

How do you take care of your brows? For starters, you need to shape them properly. You cannot just go for any shape. You need to know the shape of your face and then shape the brows accordingly.

If you have thin brows then you better make habit of applying castor oil to your brows regularly. That will make the brows thicker. And in case if you do not wish to use castor oil, then you can always use a good eyebrow pencil to make the brows look thicker.

Now when it comes to shaping the brows, first you have to make up your mind about the method of shaping them. There are plenty of ways to do it — plucking, threading, laser removal etc.

whatever you do, do not shave or use any hair removing cream. Creams can harm your eyes and if you shave then there is a bigger chance of messing the brows. You might also shave off your entire brow. So those two are a big no.

Threading is by far the safest way to shape your brows. All you need is a thread. Since no machine or chemical used, so there is zero side effect. Some prefer to shape the brows themselves, but it is better to get it done by a professional. Then there will be no chance of mistakes.

Waxing is also a good option but it is better not to opt for it if you have sensitive skin. And plucking is only for the stray ones that come out from here and there.

Now the question is what is the right time to thread, pluck or wax the brows. The ideal time is right after a hot shower. The heat will open the pores and the process will be less painful. You can also press a warm cloth on your brow and then do it.

After getting done make sure you apply some ice and lotion on the area to prevent any kind of skin irritation.
Read More...

Tuesday, June 23, 2009

Natural Eye make up tutorial

Leave a Comment
Natural Eye make up tutorial Prep lids with a primer (like Urban Decay Eyeshadow Primer Potion). After blending concealer under the eyes, wet a small, flat brush and rub it across a black cake liner (like Clinique Water-Resistant Eyeliner). Pull the upper lid taut, and gently push the brush underneath and into the lashline. Your eyes will look wider and your lashes more defined.

Always: Curl your lashes for an eye-opener before you apply any makeup

Step Two
Trace the upper lashline with a thick, smudgy black or dark brown pencil (like Sue Devitt Eye Intensifier Pencil in Kenya), and blend it upward with your ring finger. The color should be sheer by the time you reach the browbone.

Always: If you have hooded lids, apply enough pencil so that it stays dense all the way to the browbone—the darkness will make the protruding area appear to recede.
Step Three
Dust translucent powder over the lids (try Skin Alison Raffaele Transparent Finish Loose Powder) to keep the color in place.

Never: Use concealer under your eye shadow or pencil. Makeup artists often see women do this in an effort to even out discoloration and to make eye shadow adhere. But, in fact, the concealer will quickly melt (and take the rest of your eye makeup with it).
Step Four
Brush a powder shadow over the lid to tone down the color a bit. Here, Matin used a soft taupe (Laura Mercier Eye Colour in Whiskey). If you want to add a little more dimension to the color, layer green or gray on top instead.

Always: Concentrate liner and shadow on the outer corners if you have close-set eyes. The color can be more evenly distributed if your eyes are farther apart.
Step Five
A coat of mascara finishes off a daytime look. Pull the wand through the outer lashes toward the temple, the inner lashes toward your nose, and the center lashes up toward your forehead.

Never: Apply mascara on the lower lashes—it can quickly look spidery. With just a coat on top, simply blinking will tint the bottom ones sufficiently.
Read More...

Sunday, April 5, 2009

Natural Eye make up tutorial

1 comment
Natural Eye make up tutorial Prep lids with a primer (like Urban Decay Eyeshadow Primer Potion). After blending concealer under the eyes, wet a small, flat brush and rub it across a black cake liner (like Clinique Water-Resistant Eyeliner). Pull the upper lid taut, and gently push the brush underneath and into the lashline. Your eyes will look wider and your lashes more defined.
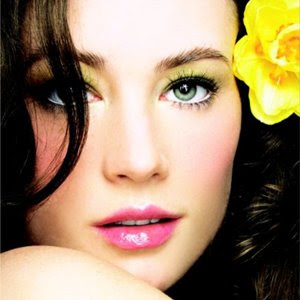
Always: Curl your lashes for an eye-opener before you apply any makeup

Step Two
Trace the upper lashline with a thick, smudgy black or dark brown pencil (like Sue Devitt Eye Intensifier Pencil in Kenya), and blend it upward with your ring finger. The color should be sheer by the time you reach the browbone.

Always: If you have hooded lids, apply enough pencil so that it stays dense all the way to the browbone—the darkness will make the protruding area appear to recede.
Step Three
Dust translucent powder over the lids (try Skin Alison Raffaele Transparent Finish Loose Powder) to keep the color in place.

Never: Use concealer under your eye shadow or pencil. Makeup artists often see women do this in an effort to even out discoloration and to make eye shadow adhere. But, in fact, the concealer will quickly melt (and take the rest of your eye makeup with it).
Step Four
Brush a powder shadow over the lid to tone down the color a bit. Here, Matin used a soft taupe (Laura Mercier Eye Colour in Whiskey). If you want to add a little more dimension to the color, layer green or gray on top instead.

Always: Concentrate liner and shadow on the outer corners if you have close-set eyes. The color can be more evenly distributed if your eyes are farther apart.
Step Five
A coat of mascara finishes off a daytime look. Pull the wand through the outer lashes toward the temple, the inner lashes toward your nose, and the center lashes up toward your forehead.

Never: Apply mascara on the lower lashes—it can quickly look spidery. With just a coat on top, simply blinking will tint the bottom ones sufficiently.
Read More...

Wednesday, April 1, 2009

Makeup Tips for Eyes, Lips and Face

1 comment
Makeup Tips for Eyes, Lips and Face You’re Eyes:


1. For great looking eyes make sure to use powder shadows for a natural look and an eyeliner pencil for drama at night. Make sure the liner has a smudge tip at one end to get that smoky eye look. Only line the top of the eye is you're looking tired. You don't want to bring more attention to dark circles under the eyes. Neutral tones with a hint of color are flattering on everybody.

2. For sheen on the eyelids, dab a bit of Vaseline for a pretty reflective quality, as well as moisture.

3. Open up the eye with a gold/beige shimmery high lighter onto the brow bone.

4. Don't throw away cash on an expensive eye makeup remover! Find a pretty glass bottle and fill it with baby shampoo.

5. If your cream eye shadow dries out, use a few drops of water or mineral oil to soften it up again.

6. Potatoes, like cucumbers, will reduce the appearance of dark, under-eye circles.


You’re Lips:

1. Use blush as a lipstick, then use clear gloss or lip balm over it. Longer staying power.

2. Natural ingredients have been used for centuries as makeup: apply beet juice to lips and cheeks as a stain, or mix it with melted bees wax to make your own lip balm! Cayenne pepper can plump the lips, but use with caution!

3. Use eye makeup remover to treat super dry, chapped lips. It's a great nighttime lip treatment!


You’re Face:


1. For a longer lasting foundation try a product with silicone. The silicone creates a sweat-proof and smudge resistant second skin. For me, I find it helps with my rosacea because the live yeast extract has healing powers.

2. A powder bronzer under blush can really even out skin tone. I dab my brush in the bronzer, then into the blush and lightly cover my whole face.

3. For a new bronzer, use a foundation that is two to three shades darker than your skin tone and apply where you would use your bronzer. In a pinch you could use a brown eye shadow.

4. Papaya mixed with plain yogurt into a paste makes a great exfoliating mask for all skin types!


5. Use an egg white mask for a quick fix for diminishing the appearance of pores.
Read More...

Friday, March 27, 2009

Ten helpful eye care tips

Leave a Comment
Ten helpful eye care tips

Ten helpful eye care tips


1. Eat plenty of fruits and vegetables which are rich in carotene ( carrots, spinach, papaya and mangoes etc )

2. Sleep well, that will refresh your eyes and makes them to work more efficiently.

3. Exercise regularly to improve blood circulation, that way eyes receives enough oxygen for better performance.

4. Drink lots and lots of water ( at least 12 glasses )

5. Blink your eyes. That’s an exercise and massage for your eyes

6. Use a clean cotton ball dipped in milk to clean your eyes. Milk is a good and safe natural cleanser.

7. To induce a glow into your eyes insert 2 drops of pure rose water using a dropper.

8. Regularly apply oil mixed in glycerin to your eye lashes and eye brows to keep them dense and dark.

9. Always use sunglasses during the peak day time to protect your eyes from sunrays

10. Place a slice of potato or cucumber on boththe eyes, after 10 minutes remove and wash the eyes. This helps to avoid under eye wrinkles and dark circles around the eyes.
Read More...

Friday, March 20, 2009

How to apply eyeliner

Leave a Comment
Don’t bother trying to convince yourselves that using eyeliner is the most efficient and quick way to ruin your make-up, by turning your eyes into blurry smeared drawings, as it is simply not true. Always remember that practice makes perfect, ladies.

How to apply eyeliner

The secret of the “tricky” liquid eyeliner lies in the mastering of few techniques that we will graciously share with you just days before the hottest part of the summer.
Proper make-up foundation

You need to give a base coat of foundation and powder for the eye make-up to adhere to. Even if you don’t want to wear foundation, just apply it to your eyes and always use liquid eyeliner after eye shadow application.

The foundation is needed so that it can even the color of the skin around the eyes and create a smooth, oil-free surface for the make-up.

We strongly recommend that before applying the eyeliner, you slightly sweep the lightest shade across the entire area from lash line to brow. For your eyes, select eye shadows in compatible shades – you cannot go wrong with a pretty shade of white, pink, beige or peach, no matter what your skin tone is.

Choosing a brush

Forget about the thick brushes. It takes a professional to handle them properly and even they use them mostly in body art. You will achieve a far more precise and fine eye line, if you use a thin brush.

There is a wide variety of products and brands on the market so you are free to experiment with something new and compact such as liner brush.

Liner brush is an extremely thin and flat brush with thick and short hair span. Its resemblance to the drawing brushes, used by artists, turns make-up application into an easy and somewhat artistic experience.

However, this brush requires a more specific type of eye shadows –those that are long-lasting with a creamy structure and have the effect of the regular liquid liner. These shades come in a variety of nuances and can be found in almost every cosmetic store.
And finally…

Bring your eyes to a half-open state when you apply the liner as this is the only way to prevent the tremor of the eyelid muscle.

You do not need to try and apply the liquid liner all in one long line. It is highly recommended that you follow the Triple Technique, instead of spending half an hour in front of the mirror in timid attempts to sweep the brush across your eye lid.

The Triple Technique consists in painting a few small dashes onto the lash line, the inner, middle and outer corner then going back and connecting them.

If needed, go back and repeat the lines.

If you are trying to achieve the cat eye look – starting at the inner corner of your eye, slowly draw a thin line across your eyelid and extend that line past your lash line.

If you use brush liner to apply all of the abovementioned techniques, you will also achieve a sexy look, but with a far more natural effect.

Regardless of your choice of products, don’t be afraid to experiment in the privacy of your own home.
Read More...

Sunday, February 22, 2009

Beautiful Eyes MAkeup Tips

Leave a Comment
We know the old adage, that the eyes are the windows of the soul. The eyes are the first feature that a person notices on another person's face. A person can tell a great many things just by looking at a person's eyes, things like age, mood and disposition.

http://beautymarked.com.au/blog/wp-content/uploads/2007/08/mac_ungaro08.jpg

Even the simplest and barest of makeup can look smashingly beautiful if the eye makeup is correctly applied.

Eye shadow. The purpose of wearing eye shadow is to add definition to the eyes. With the correct use of eye shadow, the eyes can open up and have depth in them.

There are different ways of applying eye shadow, depending on the shape of your eye.

Small eyes. Women with small eyes should go easy on the eye shadow, as too much will make the eyes appear even smaller. To make the eyes appear larger, keep the color on the eyelid itself light but put a darker shade on the crease of the eyelid. Then, highlight under the brow.

Large eyes. A woman with large eyes would want to wear dark colors on the eyelid, including the crease. The highlight should be a flat color under the brow.

Deep-set eyes. The outer corners of deep-set eyes should be given emphasis. Light colors should be applied on the eyelid and under the brow, while a medium color on the crease would finish off the look.

Wide-set eyes. Women with wide-set eyes should also use light colors on the eyelid and under the brow and a medium color on the crease. A darker color, however, should be applied to the inner corners of the eye.

Hooded eyes. To make the hooded eyes seem less heavy, light colors can be used on the lid, blended with a darker shade from the center of the eyelid to the outer corners.

Round eyes. Women with round eyes can benefit from using one shade all over the eyelid and making it extend to the outer corners. It will make the eyes appear longer.

Oriental eyes. To open the Oriental eyes, light shadow on the inner half of the lid, a darker shade on the outer half, and a highlighter under the brow will do the trick.

Regardless of the shape of your eyes, avoid very dark shades if you have very light skin. Take it easy with the shimmer because they can highlight the imperfections of the skin that should be hidden. Also, the skin of the eyelids is very thin and delicate, so try not to pull on them too much.
Read More...

Monday, January 26, 2009

How To Apply Liquid Eyeliner Flawlessly

Leave a Comment
How To Apply Liquid Eyeliner FlawlesslyApplying eyeliner is one of the most preferred ways to emphasize a woman’s eyes. No matter whether you will use liquid eyeliner or pencil eyeliner you can easily define your eyes and create a classy look. Although most of the women prefer to use pencil eyeliner as it is much easier for them, the liquid eyeliner is also a great choice for the rest of the women. Before you decide you buy liquid eyeliner you should know that it can be very difficult to apply it flawlessly at first as it needs a lot of practice and patience.

What are the benefits of applying liquid eyeliners?

* frame and defines the eyes
* give a longer lasting line
* accentuate the eyes
* change the eyes’ shape
* fill in sparse lashes
* emphasize the lash line
* deepen the look
* highlight the shape of the eyes

Many of the cosmetic brands offer a wide variety of textures, hues and types which are appropriate for the different needs, weather conditions, shape and color of the eyes. As you know there are: liquid eyeliners /that come with a brush and a tube/, pencil eyeliner, powder eyeliner, mousse eyeliners.

Unlike the pencil eyeliner, the liquid eyeliner should be applied only to the upper lash-line because it is very heavy for the lower lashes. Those who prefer the classy look should consider using only pencil eyeliner, as the liquid eyeliner creates a more dramatic and sophisticated look.

Step One.
Most of the makeup artists advice to apply the liquid eyeliner over the eyeshadows as this way it will stay put on for longer. If you are going to apply an eyeshadow the first thing you should do is to apply an eyeshadow base to avoid smudging and creasing /of course after you have applied your foundation, concealer etc./ Apply the eyeshadows as usual.

Step Two.
Before you begin the application of the eyeliner make sure you have a mild makeup remover and cotton pads in case you make a mistake. It?????s essential to shake the tube before you begin the application. Make sure your hand is steady in order to create a flawless line.

Step Three.
The best way to apply liquid eyeliner is to start drawing in the centre of your upper lash-line. If you find drawing a straight line difficult you can use pencil eyeliner and create a few dashes. Then with the point liner brush of the liquid eyeliner try to connect these dashes. Create only a few dashes. Never draw a line with pencil eyeliner and apply liquid eyeliner over it ????? you can easily ruin the result. Draw the line as close to the lash-line as possible, following the natural curve of your eyelid.

Step Four*.
If you want to create a thicker line, build the line gradually very carefully.

Step Five.
Curl your eyelashes with an eyelash curler. Choose black or brown mascara and apply the first coat carefully. After a few minutes apply a second coat. Choose a volumizing or lengthening mascara, depending on your eyelashes. Consider dusting your eyelids with a translucent powder in order to avoid creasing and smudging. Do the rest of your makeup as usual - blush, lipstick, lip gloss, face powder.

Useful Beauty Tips:

* To make the line longer-lasting you should apply the eyeliner over your eyeshadows.
* In case you make a mistake use a cotton pad and a mild makeup remover to correct it.
* Always choose a color that suits your eyes and the color of your eyeshadows.
* Never apply liquid eyeliner to the lower lash-line, use pencil eyeliner instead.
* Always start the application in the centre of your eyelash line on the upper eyelid.
* When applying liquid eyeliner always follow the natural curve of your lash-line.
* Keep your hand steady - this way it will be easier for you to apply the eyeliner flawlessly.
* Remember: eyeliner should be applied as close to the lash-line as possible.
* Never create too thick line at first, build the line gradually.
* When selecting liquid eyeliner, always make sure you choose one that dries fast in order to avoid smudges.
* Before applying liquid eyeliner, always shake the tube for a few seconds.
* Most of the makeup artists advice first to draw a few dashes with a pencil eyeliner and then to apply the liquid eyeliner.
* If you want to achieve a more dramatic look, create a thicker line.
* Remember: always apply the liquid eyeliner after the eyeshadows, but before the mascara
to prevent smudges.
* Eyeliners in black, brown and dark violet suits almost everyone.
* Don’t forget to blend the line carefully, using a small eyeshadow brush.
* Remember: for liquid eyeliner always use a point liner brush as it will allow you to draw an even line.
* Never keep your liquid eyeliner in the bathroom as water may trap in it.
* Remember: always let the eyeliner dry before you open your eye.
* Never apply eyeliner if your eyes are tired or infected.
* Harmonize the eyeliner with your mascara, so that it frames your eyes and makes your lashes look thicker.
Read More...

Wednesday, September 3, 2008

Eye Shadow Tricks

Leave a Comment
Eye Shadow Tricks


Cream eye shadows are great for this look -- light to medium tones work best. Add mascara and brown pencil as needed.

Emphasizing the crease line for depth: Begin with the lightest color first. Dust a light tone over the entire eyelid with a medium eye shadow brush using the following technique: Hold your brush very lightly and go from the lashline to slightly beyond the crease (where the eyelid meets the browbone). Glide up to the browbone and the brush will naturally lift off your face -- just where you want to color to end.

Then dust a medium shade in the creaseline (something with a bit more depth than what went on the eyelid), using a small to medium shadow brush. Extend slightly beyond the crease, up toward the browbone. This adds depth to the eyes. And by going slightly beyond the crease, you can create a contour that's visible even when your eyes are wide open.

You can stop here. But if you want more drama, place a medium to deep tone on the upper lashline, using an angled eye shadow or eyeliner brush. And keep this line soft and smudged. Still more drama? Brush more of this color under the lower lashline -- apply with the smudge brush in mini downward strokes (don't brush across -- that creates too strong a line).
Emphasizing the lashline for shape: For definition of eye shape, dust a light to medium tone over the entire eyelid (see first step in Basic Technique #1). At the lashline, apply a darker tone with an eyeliner brush to create a smudged, dramatic line.

When eye color is complete (you shouldn't be able to see where any of the colors begin or end) use a large eye shadow brush and dust the entire eye area with loose powder to help set and blend. Add mascara and brow pencil, as needed.
Read More...

Saturday, August 23, 2008

How To Pluck Eyebrows

Leave a Comment
Plucking Your Eyebrows


Eyebrows and beautiful eyes Well-shaped eyebrows can take your face from ordinary to dramatic and beautiful. As long as you do not over pluck it, today's eyebrows are natural looking with a tapered arch, and you can groom them yourself in a few easy steps.

1. Look for photos of women in the magazine, same face shape like yours and the brows you like.

2. Draw your desired brow with a white pencil.

3. To ease the pain, numb brow area with an ice cube.

4. Finally, pluck out stray hairs that lie outside the white area you have penciled.

5. If you are nervous about shaping your own eyebrows, ask friends to refer you to a salon that does it well.
Read More...

Thursday, July 31, 2008

Eyebrow Shape and Shades For Your Face

Leave a Comment
Eyebrow shapes nonverbally express simple facial features that highlight individual personality. So choose and create perfect eyebrow shapes with right shades that transcend the beauty of your face. Own the shape you always admired with these useful tips.

Eyebrow Shape and Shades For Your Face

Some useful tips to remember while shaping your eyebrows.

* The primary rule of shaping the eyebrow is that the tweezers should have slant edges and rough textured point. Make sure to replace them every year.
* Main features of face such as mouth, eyes and eyebrows are never balanced symmetrically. Therefore while doing your brows it is important to bring all the features into balance with each other in order to produce a proportioned look.
* Before shaping the eyebrows always remember to spray a little hair spray on your brows and brush them using your toothbrush to keep them in place.
* Wipe the brow area with a cotton ball soaked in astringent before tweezing your brow, as the cooling effect will help you not to feel much pain due to numbness.
* Eyebrow should be shaped according to the natural line of your brow bone.
* It should extend and taper slightly beyond the eye.
* The arch should be highest at the outer corner of the pupil.
* Avoid slanting upward eyebrows as they give angry look on your face.
* To add volume to your brows, use stiff slanted brush to apply eye shadow in short gentle strokes.
* People with thin brows can apply little colour to the top of each eyebrow and brush it in place for denser look.

Perfect eyebrow shapes


* Angular eyebrow shape works well for those with round face.
* Round fuller eyebrow is suitable for woman with large eyes or wide forehead. These brows should follow the frontal bone and taper gently. A heart shape face can also be emphasized with slightly rounded eyebrows with sharp angles.
* Women with wider jaws and round cheek should go for arched shape eyebrows like many celebrities. It gives width and expression to the eye and balances prominent nose or a large mouth.
* Low arched shape is appropriate for those with small forehead as it gives illusion of more length.

Brow shades

Eyebrow colour can either dominate your face or disappear entirely. So, be careful when you are using brow shades. Here are some of the shades for your help.

* Olive complexion women can use tawny or brown brow shades
* Dark African-American complexion women can use gray shades
* Fair complexion women can use blonde shades
Read More...

Wednesday, July 23, 2008

How to Choose The Right Sunglasses

Leave a Comment
How to Choose The Right Sunglasses
The sunglass size should be in proportion with the face size. This means that smaller sunglasses are best for smaller faces; larger sunglasses for larger faces. The frame shape should contrast with, that is, be the opposite of, the shape of the face. These tips must not be taken as rules but they can help you to choose your right frame.

Oval face
Almost any style works for oval face. Experiment with the latest looks, such as wraparounds or shields. Square shaped frames with gently rounded edges and higher temples also look good on an oval face.
Frame suggestions : Any frame shape


Round face
Frames should make the face appear longer and thinner. In general, look for frames equal to or slightly wider than the broadest part of the face. Minimize the curves and add definition with soft, angular, rectangular styles or double brow styles. Higher temples will create a longer profile. Sunglasses with brow bars also pull the eye upward, making the face appear longer.
Frame suggestions : Wider frames with angular / rectangular styles.


Diamond shape
This face shape has wide or high cheekbones with a narrow forehead and chin. Oval sunglasses will soften the contour of the face, although softly curved square frames will work as well. Make sure the styles are no wider than the top of the cheekbones.
Frame suggestions: Oval, Square, Rimless.


Square face
This face shape consists of a strong jawline, a broad forehead and wide cheekbones. Reduce the angles with soft, curvy styles that will give the face some definition such as cat-eye styles. The classic oval also works well for this face shape.
Frame suggestions: Oval, Round, Cat Eyes.


Oblong face
Widen and shorten the face with sunglass styles that do not extend beyond the widest part of the face. Round or square shapes will look great on this face. Frames with short horizontal and long vertical lines also work. Decorative or contrasting temples add width to the face.
Frame suggestions: Round, Square


Triangle shape
This face has a narrow jaw and a wide forehead. Soften the lower portion of the face by accenting the eye area. Styles such as cat- eyes should angle outward at the top corner and be wide enough to balance the jawline. You can also try metal frames with rimless bottoms.
Frame suggestions: Frames with a Straight Top Line, Cat Eyes


Skin Tones

* Pale complexions: Try lightweight frames or those with a touch of colour such as rose or amber. Tortoiseshell frames suit fair complexions (avoid darker versions) but clear, blue or green tinged frames tend to drain colour from cheeks.
* Dark complexions: Olive, Mediterranean, Golden or Asian skin and dark hair can look stunning in silver, gold or clear frames – but avoid black which can be too heavy.
* Black Skins: All metallic frames suit black skins and amber often works well – be very careful with black frames, which can look spectacular or awful!
Read More...

Sunday, July 13, 2008

How to Apply Eyeshadow, eyeliner, pencils

Leave a Comment
Making the eyes come alive is a real art and like any good artist you will have to first leam the exacting techniques of accurate Brush work and careful .colour-blending. Almond shaped eyes are considered to be the ideal. So when making-up eyes, one tries with the help of light and dark eye make-up to inake the necessary changes to give the eyes an almond appearance.

Eye is a part of your body and beauty. Make-up can adorns your beauty only if it is applied very carefully. Your Eyes are the window to your soul. Eye makeup is a complex set of steps. Select a foundation that is conformable to your skin tone and dab some spots around the center of your face. Put your foundation first over your whole face before you start on your eye makeup. Mix the foundation using a make-up sponge or your fingertips till it covers your entire face.

Be particularly careful about mixing your foundation at the edges so that it does not look like a mask. Apply an eyeshadow primer from lash to brow to make your eye makeup remains last. You can skip this step if you prefer. For your eyes, select the eye shadows in compatible shades. Actuate the lightest shade just below your brow bone, and the medium shade over the rest of your eyelid. Apply the dark eyeshadow into the crease of your eyelid to deepen your eyes. Combine the two where they meet with your fingers to give a more natural look.

Apply the light shadow from lash to press at the center of your eyelid. Putting on liquid eyeliner does take some exercise, so have a bottle of makeup remover to hand until you are confident in the technique. There are two sections of eyeliner, wet and dry. Wet eyeliners attend to give a darker, more dramatic look. Dry eyeliners are milder and better for creating a smoky look. If you purchased eyeliner which is a pencil or stick, draw around the rim of the eyes in a straight line.

Not to use a lip liner if you wish for your face to look slimmer and if you must use one, line your lips after putting lipstick as then you won’t be left with a grisly looking lip outline when the lipstick wears off. Avoid using lip liner which is too dark. Use a brush to fill in your lips with the desired color. Don't draw the pencil across your eyelid as this could result in elongation of the skin. Inspite, apply the color to the palm of your hand, pick up some of the color with your pinky and apply softly to eyelid.

Eye Pencils

Whether they are being used to shade or define the eyes, lips or brows, pencils should glide on smoothly, without dragging the skin, If they seem to be too soft and crumbly, place them in the freezer for a few minutes to harden before applying, Ifthey are too hard and pull at the skin, soften the point first by gently running it over the back of the hand.

An eye pencil is used in the crease of the lid or as an eye liner. Eye pencils come in many colors, and the newest are creamy enough to spread like cream eye shadow. Used with shadow, pencils can effectively compliment your eyes.

An eyebrow penciI is harder and is made to be used on the eyebrows.

Eyebrow Pencils

These can be used to fill sparse brows and enhance the overall shape, Take a sharpened pencil in the shade closest to the natural colour of your eyebrows and fill any open spaces using short irregular strokes to simulate real hair, When defining the brows, avoid drawing on one strong line as this will look false, Work over the brows in small feathered strokes, If the definition is too strong, soften it by dusting with translucent powder or roll a cotton bud over the brows.

Applying Eyeshadow

Eye shadow, in striking, slightly shimmering tones, applied with a light hand, can give the face an air of lumrnosity. EYESHADOW should always glide on smoothly, and can be used to subtly change or enhance the shape of the eyes, to add simple definition or to make a strong impact, depending on your choice of colour. It is also useful to disguise the blueness many of us have on the skin on our eyelids.
More on Eye Shadow

Eyeliner Application

EYELINER Application requires a steady hand, Ifyou find it difficult to apply liner with precision, try drawing it on using small feathered stokes and then blend with a fine-tipped brush or the point of a cotton bud , To make things easier, put a mirror on a flat surface and then work looking down into it.
More on Eye Liner

Eyeliner is gettable in a wide range of hues, from the common black, brown and grey to more adventurous shades such as bright primary colors, pastels, frosty silvers and gold. Using lipstick with moisturizers and sun protection is one efficient way to ward the lips from weather changes. Lipstick adds the finishing touch to any makeup application. For longer-lasting lip color, shade both lips with lip liner after outlining them.

Face powder is among the few beauty essentials. Mineral face powders are chemical and fragrance-free and hypoallergenic. Powder gets stick on eyebrows and eye-lashes, if not cleaned with an eyebrow brush. A powder must always be applied after the foundation and earlier the eye makeup. Opt for an oil-free powder if you have oily skin. Avoid applying large amounts of powder under the eyes. Always remove the excess powder with a clean brush. Apply cream blusher in light downward direction to prevent it from creasing in specks of color from catching in the fine hairs on your face.

Eyebrows

Factors to be considered before shaping your brows:

The facial distance from hairline to chin.
The distance between both the eyes.
The hair color and color of eyebrows.
The facial distance from hairline to chin.
The width of the forehead from temple to temple.
The thickness of the brows

Small eyes: Don't use too much shadow or liner - it will make you eyes look smaller. Apply a light color on eyelid, use a darker color in the crease and use a highlighter under the brow.

Large eyes: Wear darker shadow on the lid and extend it to the crease. Use a flat color under the brow to highlight.

Deep-set eyes: Use light colors on the eyelid and under the brow. Use a medium color in the crease. Emphasize the outer corners with shadow.

Wide-set eyes: Use darker colors on the inner corners of the eye.

Hooded eyes: Apply light colors on the lid. Use darker colors from the center of the eyelid to the outer corners and blend.

Round eyes: Make round eyes longer by using color all around and extending toward the outer corners.

Asian eyes: Apply highlighter under the brow. Use light shadow on the inner half of the lid and a darker color on the outer half.

How to apply eye mascara


With modern mascaras there is no need to pump the wand in and out of its container before applying, This can actually cause overload and result in clogged lashes, You need only enough product on the wand to coat the lashes, so any excess should be wiped off with a tissue, Roll the wand through the lashes to help curl-definition, Always work on the upper lashes from underneath to avoid overloading and keep mascara on the lower lashes to a minimum, especially if you are looking tired or have a tendency to rub your eyes a lot.
Read More...

Sunday, July 6, 2008

Make Up Your Eyes in 8 Steps

Leave a Comment


Here's How:

1. Prep your eyes with concealer Concealer can be used to cover up undereye circles or just the bluish discoloration just under your inner eye. To cover dark undereye circles, apply three dots of concealer under each eye. Start at the inner corner where skin tends to be darkest, then under the pupil and the third on the outer edge. Pat, never rub with your ring finger (this finger tends to have the softest pad) until it disappears.

2. Apply eye base to your lid Eye base is the secret to keeping your shadow in place for hours. Without properly priming your lid first, your eyeshadow will likely end up a greasy line in your crease.

3. Apply shadow. It's great to use a three-toned shadow and build from lids to brow. Allowing them to blend into each other like a rainbow is gorgeous, according to celebrity makeup artist Mally Roncal. Start with a light color that almost matches your lid. Sweep the color across the lid and up to your browbone. Follow with a medium color across your lid only. Build on this with a darker color in the crease. Blend the colors well.

4. Follow with eyeliner Dark eyeshadows work great as eyeliners. Wet a slanted brush, then dip in a dark eyeshadow. Line eyes as close to the upper lashes as possible from the inner corner to the outer corner. Follow with liner on bottom eyes, but only line from the middle of the eye out. Smudge the bottom line with a Q-tip or your finger. You don't want a prominent line. For a smokey eye, use a brush to pat in a dark eyeshadow along the upper lid and below the lid. You don't want a stark line, instead you want to blend it so it's 'smudge-y.'

5. Brighten your eyes with a highlighter This step involves only the inside part of the eye. With a gold or pink highlighter (white is too bright), draw a v-shaped shape that follows the inner corner of your eye from top to bottom. Blend with your fingers. This will help make eyes 'pop.'

6. Highlight your brow Take the same highlighter and dab it on your browbone, concentrating on your mid-brow outward. Blend with your finger.

7. Curl lashes An eyelash curler will make even long lashes look more gorgeous. For added effect, you can heat the curler under a blowdryer for a couple seconds. Test curler before applying to lashes because you could burn yourself.

8. Apply mascara Place the wand of your mascara brush at the bottom of lashes and wiggle back and forth. Follow with another few sweeps of the wand. Apply to bottom lashes as well.
Read More...

Monday, June 23, 2008

EYES CARE

Leave a Comment

To rest the eyes, lift them occasionally from close work and look into the distance.
Give rest to your tired eyes by applying two thin slices of cucumber as cool compress and relax as you do so.

Splash cold water occasionally to eyes to relax them and bring back the sparkle to tired eyes.
Prevent the glare of light which has a fatiguing effect on the eyes. Light fixtures in the bedroom should reflect light upwards as well as outwards and not direct on the eyes.
Dip gauze. pads in light tea and keep on the tired eye for 15 minutes.
To fade away -dark circles below the eyes, make paste of three almond kernels and milk. Apply this paste: and leave till it dries.
When applying cream or make up around the eyes use the ring finger (as it exerts less pressure).
Dark shadows and tiny lines under the eyes can be disguised by applying a light coloured foundation under them and smoothening them.
To remove puffiness under the eyes, use raw potato paste sandwiched between two thin pieces, of (for each eye) and keep on the eyes for 20 minute.

If your eyes are on the smaller side, open the using subtle grey, beige or brown shades of shadow, using a darker shade on the crease of the lid.
Apply a pale shade of eye shadow on the lid and deeper shade below the brow for deepest eyes.

When applying mascara, brush with an outward sweep to the underside of the top lashes and allow it to dry before giving a second coat. After this, use a small comb or a small brush to separate them.
Remove mascara from the eyes by rubbing a little moisturizer on the lashes or by dipping a bit of cotton wool in hot water and wiping them. Or place a roll of cotton wool under the top lashes and wipe from above with another piece of damp cotton wool.

If your brows are thick, pluck hair from inner corners with a pair of clean tweezers and pluck from the middle to make an upward arch and let the brow end in a thin line.
Before you start plucking the hair from the brows, draw the sort of eyebrows you have in mind with an eyebrow pencil and pluck from beneath.
When tweezing hair from the eyebrow, pull in the direction of the hair growth with a quick flick of the hand.
Never pluck from above the brow or the re-growth will give a greenish appearance.

For a long face, give the brows a shape by extending them past the outer corners of the eyes to give the illusion of width.

For a square face, pluck above the inner eye-corners curving gently out.

For a round face pluck hair giving a straightest arch.

If the eyes are deepest, pluck the hair from under the brows to give the illusion of large eyes.

Simple everyday eye exercises

  • After every hour before a computer screen, close your eyes gently for 30 seconds to relax them.

  • Yoga experts recommend you to rotate your eyes often to relax muscles. Move your eyeballs from extreme left corner to the right corner.

  • Hold a pencil at arm's length and slowly bring it towards your nose, keeping eyes focused at all times. This helps prevent blurred vision.

When to see a doctor

  • If you have persisting headaches see a doctor and well light your work area and correct your reading/writing posture. · If you have sties often, they may indicate refractive error.

  • If you squint every time you read a book or watch television.

  • If you have dryness of the eyes, check out if it's due to antihistamines, decongestants, diuretics, muscle relaxants, tranquilizers that you may have taken.

  • If you plan to take oral contraceptives they may decrease tolerance of the eye.

  • Even if you have no complaints it's important to see a doctor and have a routine eye check up.

Don'ts of eye care

  • Don't wear contact lenses for extended periods of time or overnight as this leads to complication.

  • Don't rub eyes frequently as this can cause an eye infection as few of us bother to wash our hands before touching our eyes.

  • When you splash water do not do this furiously believing doing this will take away tiredness instead wash gently as splashing may hurtle the smallest dust particles or an allergen which may minutely damage the cornea.

  • Use disposable tissues instead of handkerchiefs to wipe eyes, as they are more hygienic.

  • Don't sit near than 15 feet from the television and keep your book at least two feet away for stronger eye muscles.

  • Use cream based eye makeup as powdery eye shadows can enter eyes and, cause irritation. Be very gentle in case you wear lenses.

  • Avoid using aerosol products like hairspray if you wear lenses.

  • Don't use your mascara for more than a year.

Read More...

Tuesday, June 3, 2008

Eye Care Tips

Leave a Comment
Melting eye shadow is a problem for many women, but there is a way to make it "stick" a little longer.

If you use a damp eye shadow brush and apply a layer of face powder to your lids and allow to set, the shadow will stay in place for the day.
Takes an extra second or so but the effort is well worth it.

Beauty Tips For Eyebrows

Your eyebrows add strength and definition to your face. Well groomed eyebrows enhance your beauty.

You should pluck eyebrows before bedtime so any redness will disappear overnight. In shaping your eyebrows use your facial features.

Use a pair of slant edge tweezers which grip hairs easily. Comb hairs one way and then the other to remove loose hairs.

You should pluck hairs between the brows and any stragglers. Never remove the hairs from above your eyebrows.

Pluck each hair individually close to the root. Work in the direction of the growth.
Always avoid over plucking. In defining your eyebrows choose a shade similar to your natural hair colour.

When using a pencil you should apply in small, feathered strokes. Starting at the inner corner work outwards.

Blend the colour with a brush. To tame stray hairs just use hair gel and comb through to neaten.
Read More...

Tuesday, May 27, 2008

Eye care Tips

Leave a Comment
# Dip wads of cotton in a chilled mixture of cucumber and potato juice. Keep this on your eyelids for 15 to 20 minutes and gently wash it off. Apply a little baby oil.
# For long eyelashes.., apply a thin coat of castor oil every night. It strengthens lashes and cools your eyes.
#

Massage a few drops of coconut oil around the eyes to get rid off dark circles.
# To reduce puffiness of your eyes, grate a potato; tie in a cloth and place the cloth over your eyes for about 15 minutes.
# Add a small pinch of salt in water and wash for bright and sparkling eyes.
# Mix tomato juice and lemon juice in equal quantity and apply around the eyes. After 30 minutes wash it off with cold and hot water alternatively.
# Make a paste of sandal wood and nutmeg. Apply the paste around the eyes before sleeping and wash it off in the morning.
# Crush a cucumber and take the juice. Add a little rose water and apply around the eyes and wash it after 30 minutes.
#

Place cotton wool swabs dipped in cold milk on closed eyes for removing dark circles.
Read More...